
From Steve Rogers to Captain America:
This is the story of my 10/22, Captain America:
Here is Steve Rogers, a stock 10/22:

Here is Captain America:

And here is how we got there . . . .
A few years back, I won $200 in a sales contest right before Christmas, and I used it to buy a bare bones 10/22 on Christmas Eve. At the time, I named the gun Paul after my boss. Earlier this year, I bought a Browning Buck Mark .22LR pistol that I named Bucky, and it just made sense to start calling the 10/22 Captain America.
The problem was, Captain America wasn’t special. It was still bare bones. Yes, it was fun to shoot, and I had proved that about 2,000 times. But it wasn’t an Avenger by any stretch.
In fact, it was more like 90 pound Steve Rogers.
So, I decided to start my own Super Soldier program*.
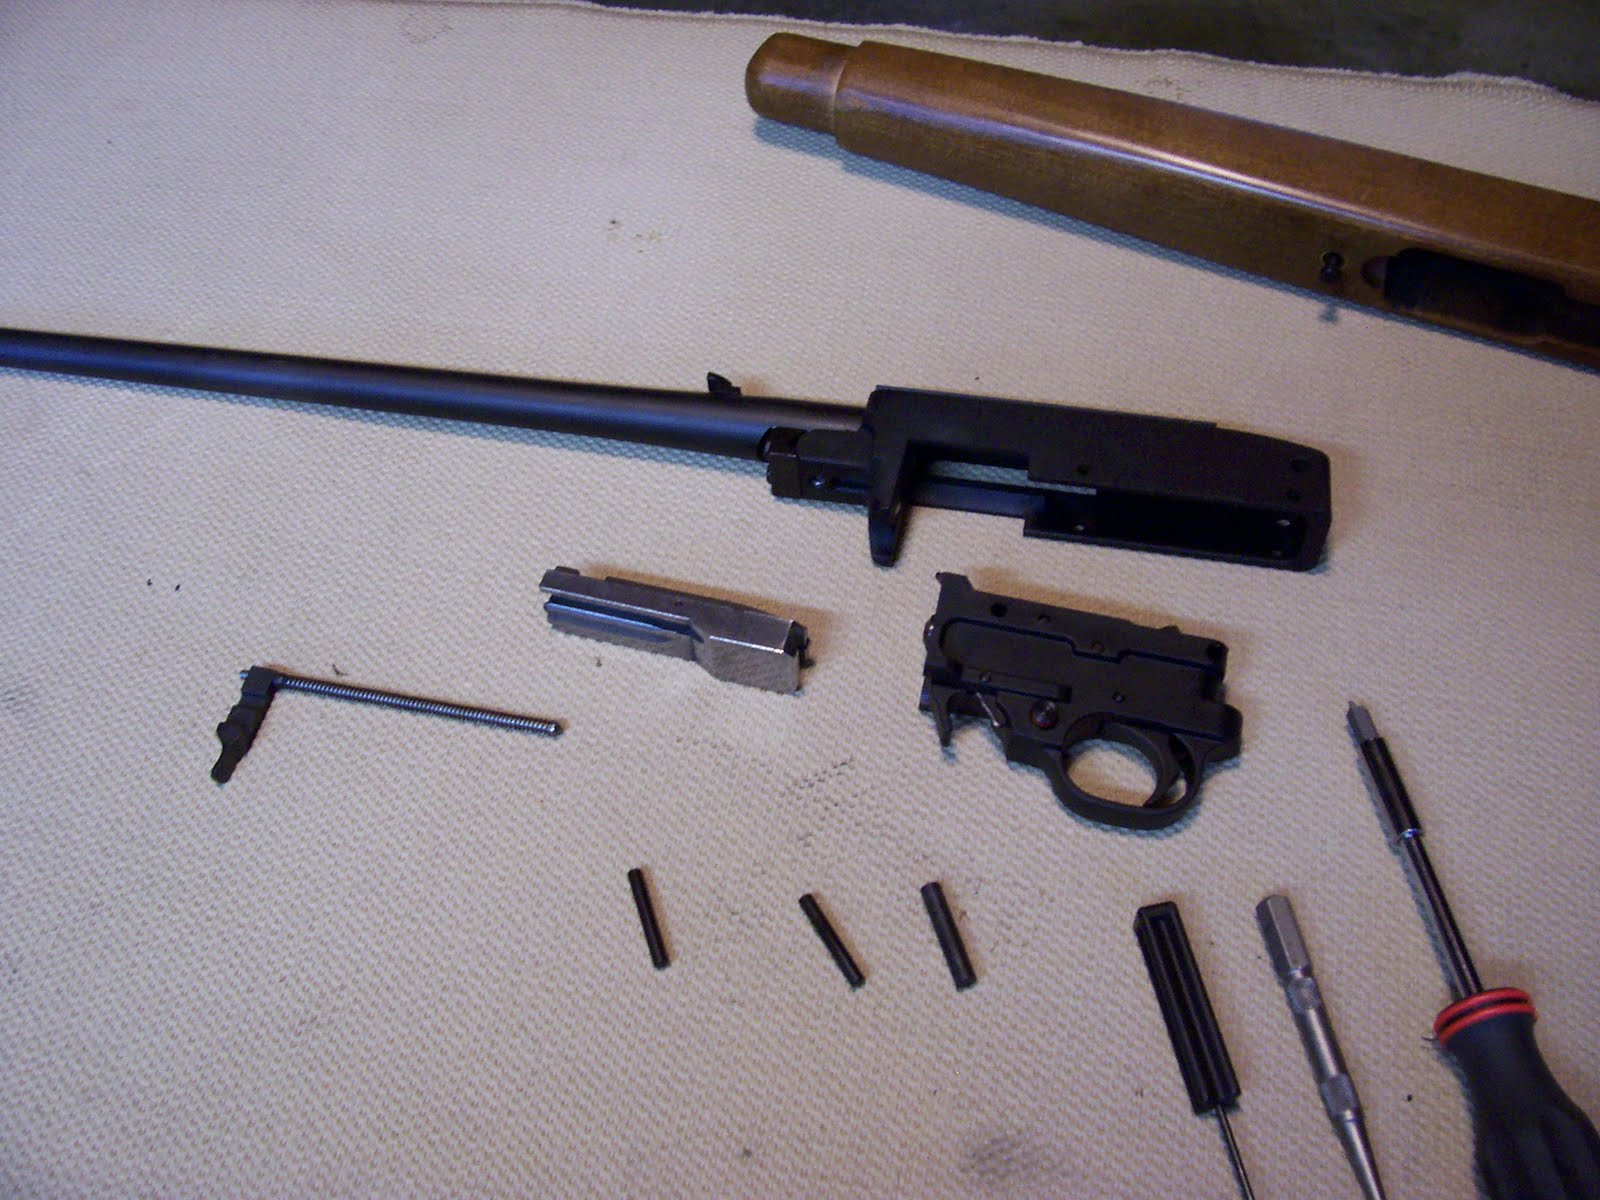
I started by disassembling the 10/22. This can be done with a screwdriver and a punch. In fact, my Glock Armorer tool just worked just fine. For my modifications, I needed the receiver, the trigger group, the bolt assembly, and the bolt handle, guide rod, and recoil spring assembly.
Actually, this photo is a little deceiving, as it shows the parts after about 20 minutes of cleaning. I had shot about 2,300 rounds through the gun without cleaning the bolt or the receiver. The bolt assembly was completely black.
For my first modification I swapped out the factory extractor with a Power Custom Sharp Claw Titanium Extractor. The factory extractor is a stamped metal piece, and I could see the Power Custom replacement has a sharper profile and a cleaner face. This new piece should eliminate the periodic failures to extract that I have seen.
I also changed out the bolt release with a Volquartsen Automatic Bolt Release. One of the things found annoying about the 10/22 was that to release the bolt, you had to press up on the bottom of the bolt release, while pulling back on the bolt handle, and holding your mouth a certain way, and reciting a Druid chant. Okay, the last two weren’t really necessary, but they didn’t seem to hurt.
This Volquartsen piece is designed so that you just pull back on the bolt handle, let it go, and the bolt releases. Just like a regular rifle. Gee.
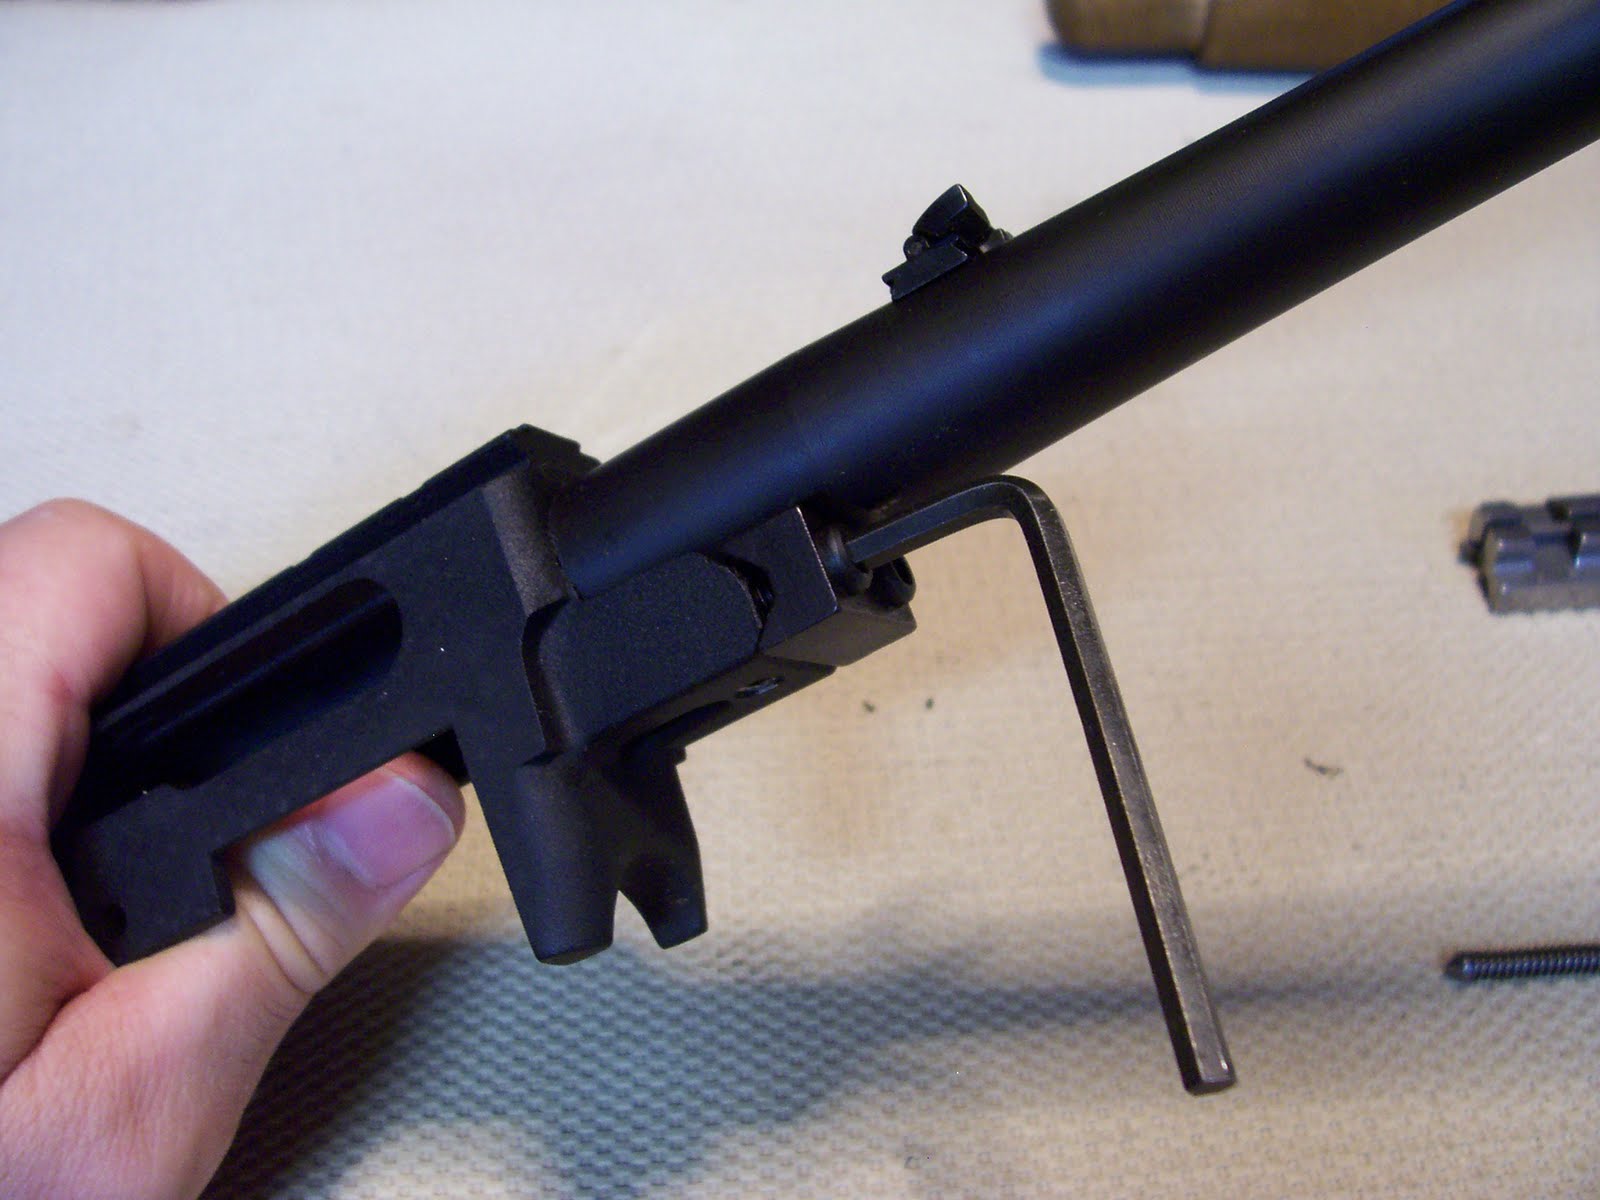
Next, I removed the factory barrel. The barrel is held in place by a barrel retainer and two hex head screws. Removing the screws, the barrel slides out. Actually, since my gun had 2,300 rounds through it, I had to put the barrel in a vise (protecting it with a rubber insert) and pound the receiver with a rubber mallet to get it to let go.

I then scrubber out the receiver and made sure it was ready for a new barrel.
Then, out came the new hardware.
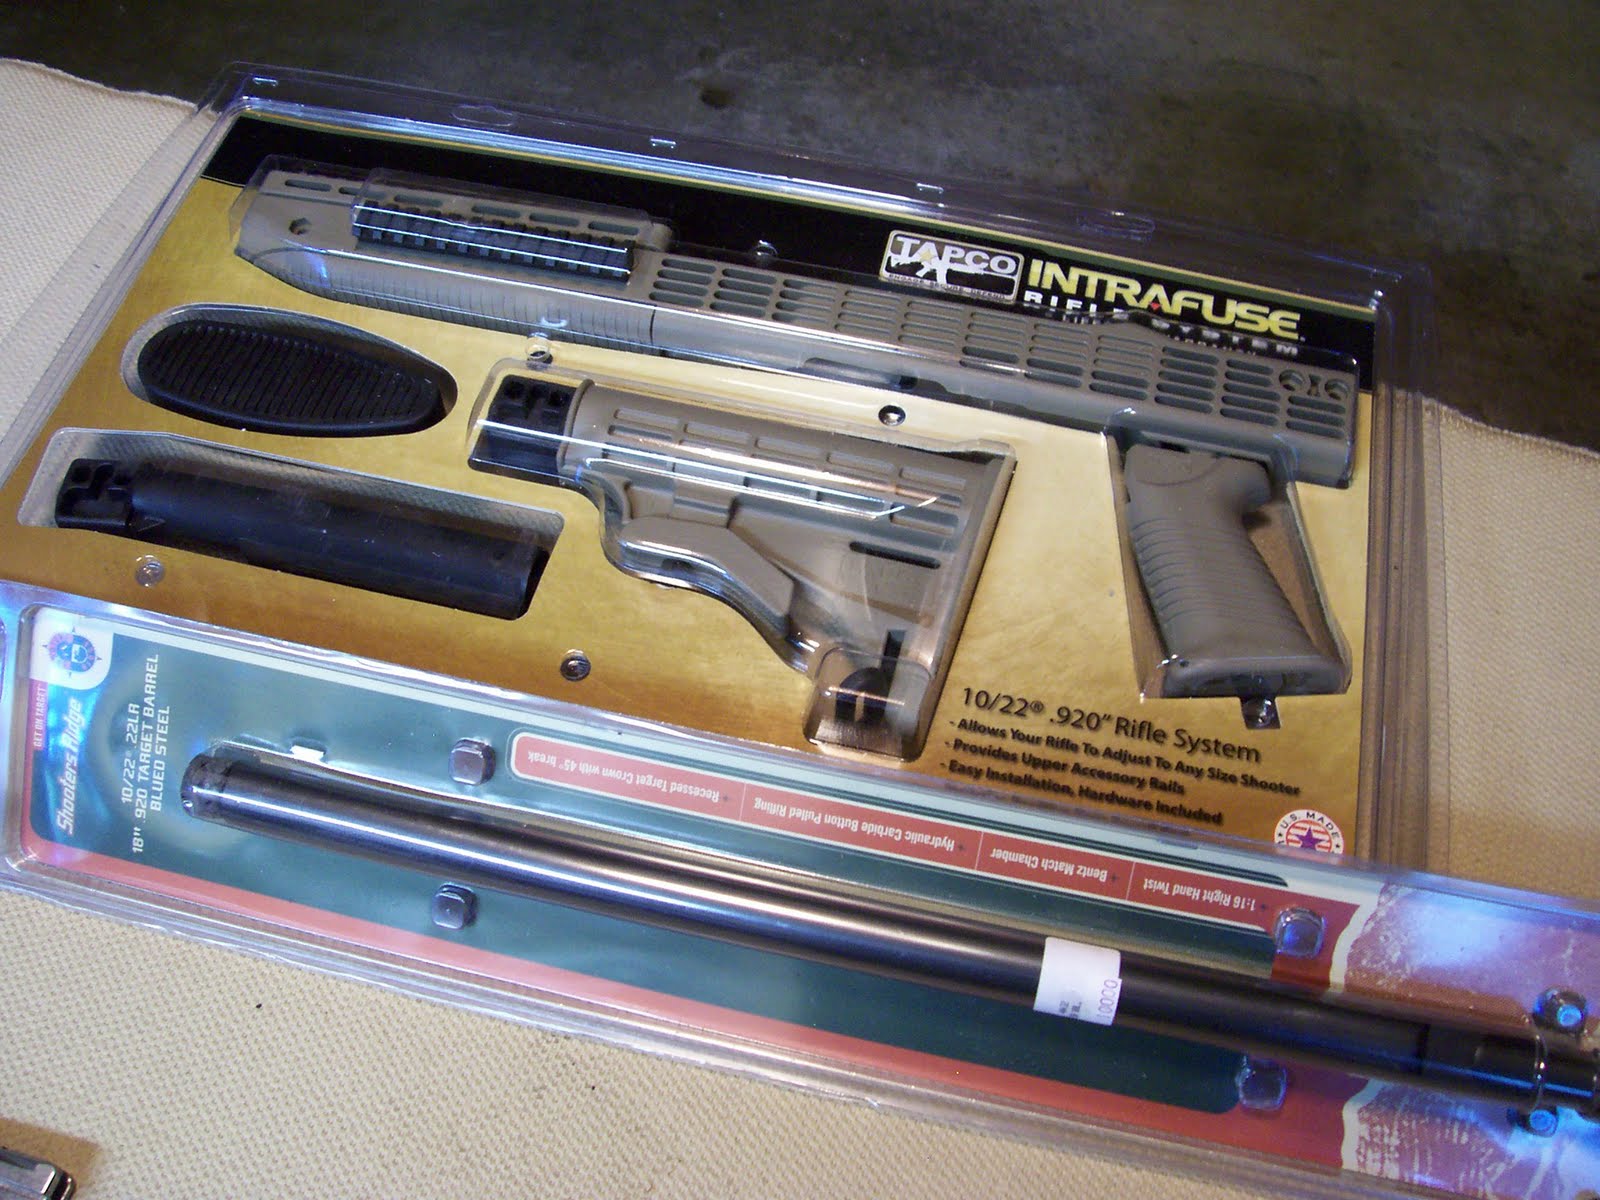
The barrel I chose was a Shooter’s Ridge bull barrel, that I bought at the gun show last weekend, and a Tapco T-6 stock I bought off of Amazon.
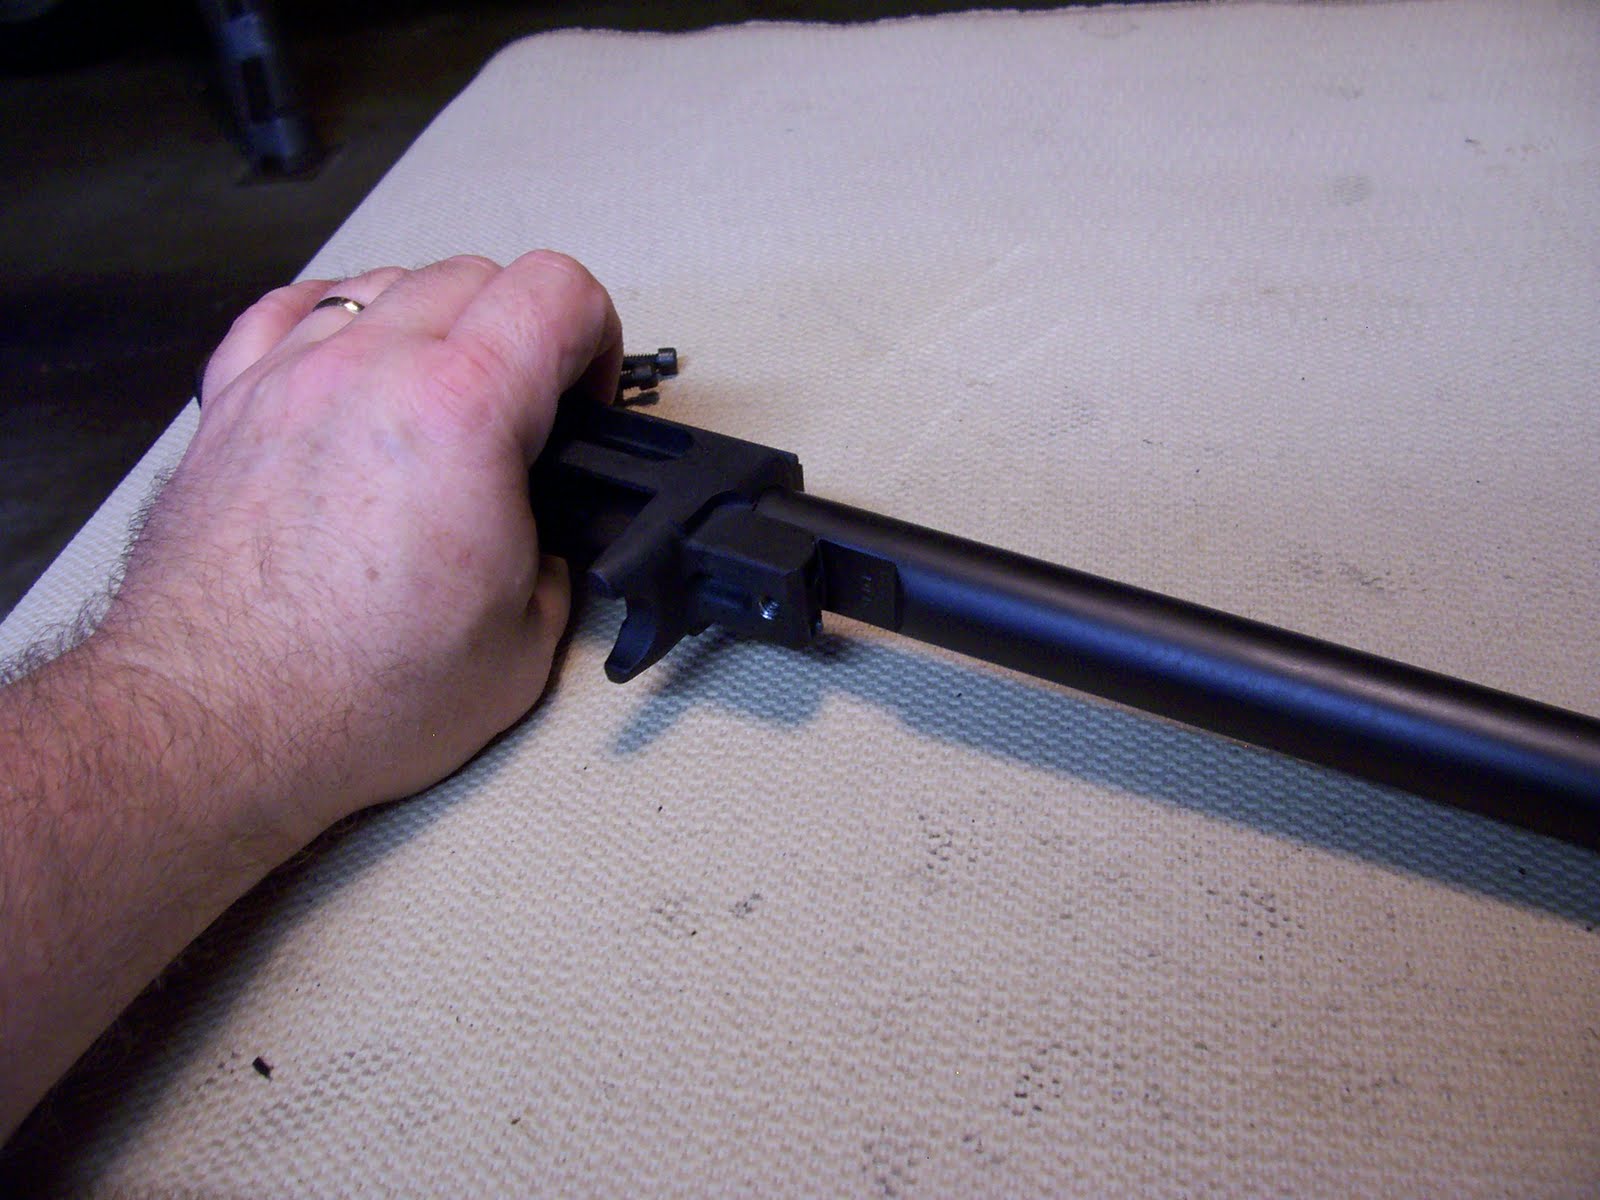
The barrel is installed in the reverse of how the old one was removed, but without the pounding and cussing. Slide the barrel into the receiver and line up the ridge for retainer with the retainer lip. Much easier.
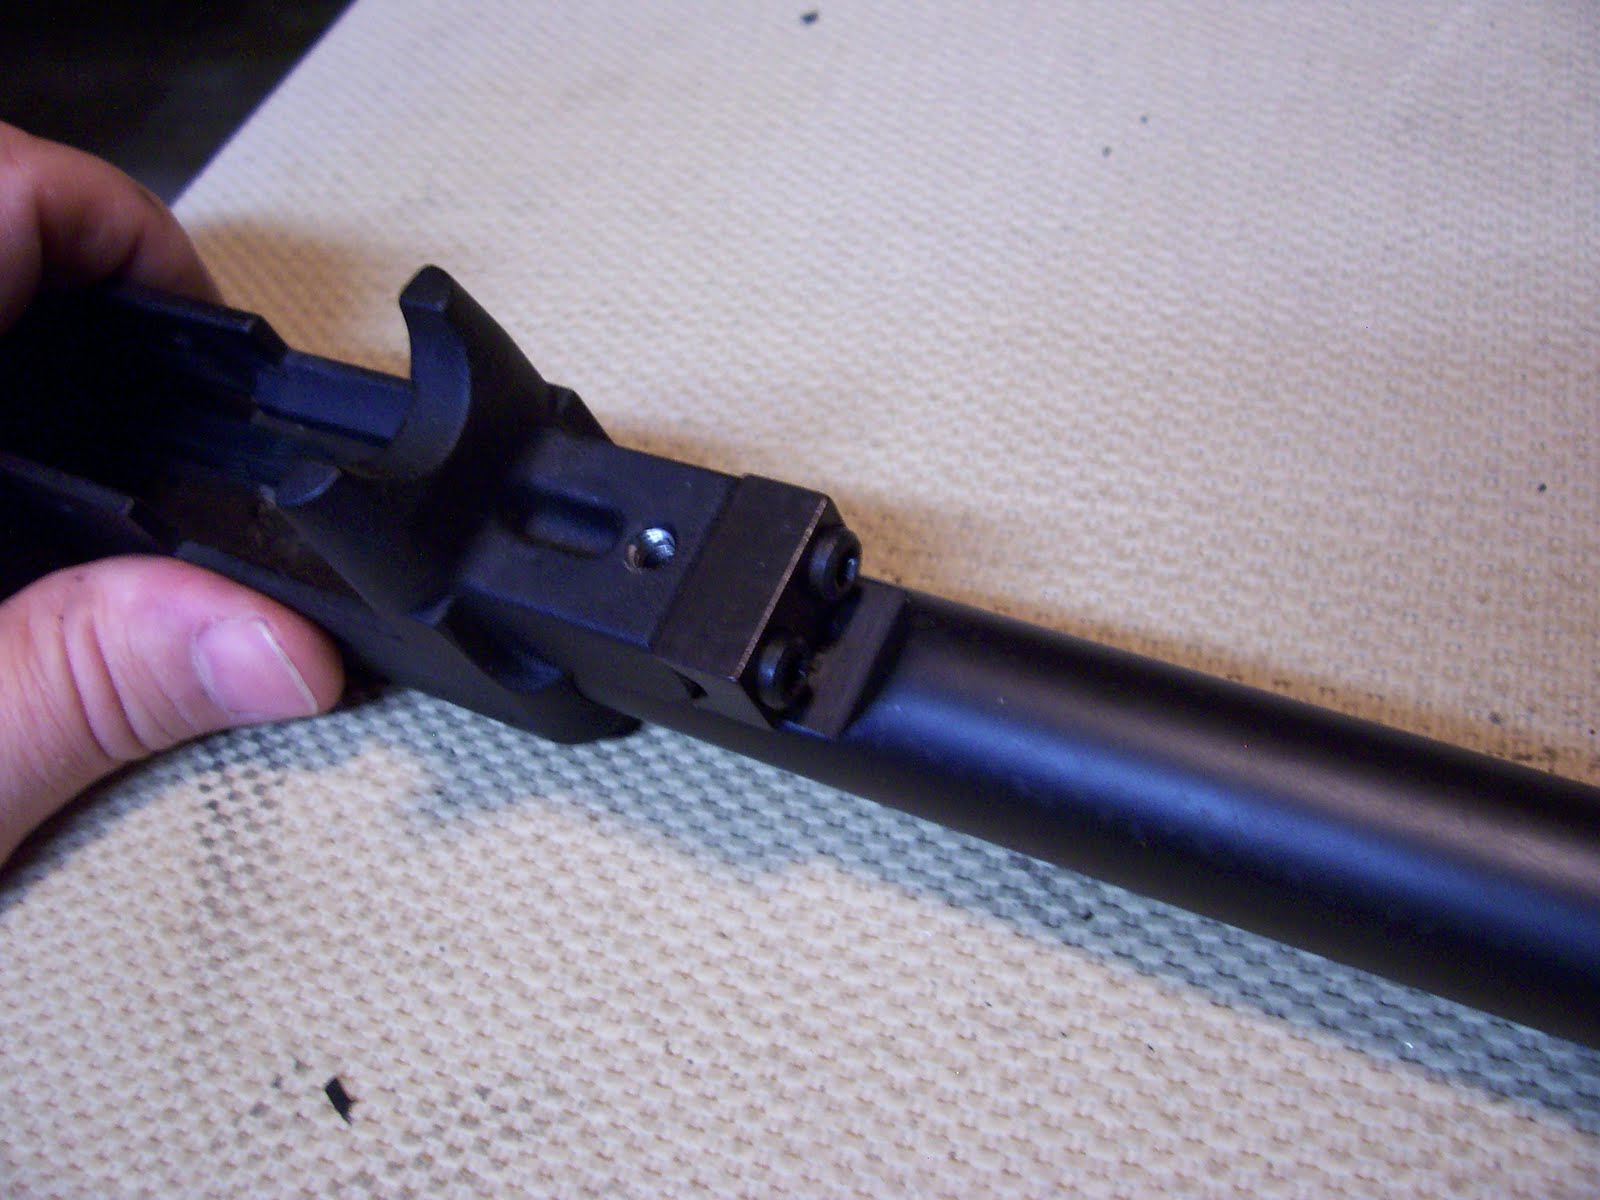
Install the retainer using the two hex head bolts.


Install the bolt, then the trigger group.

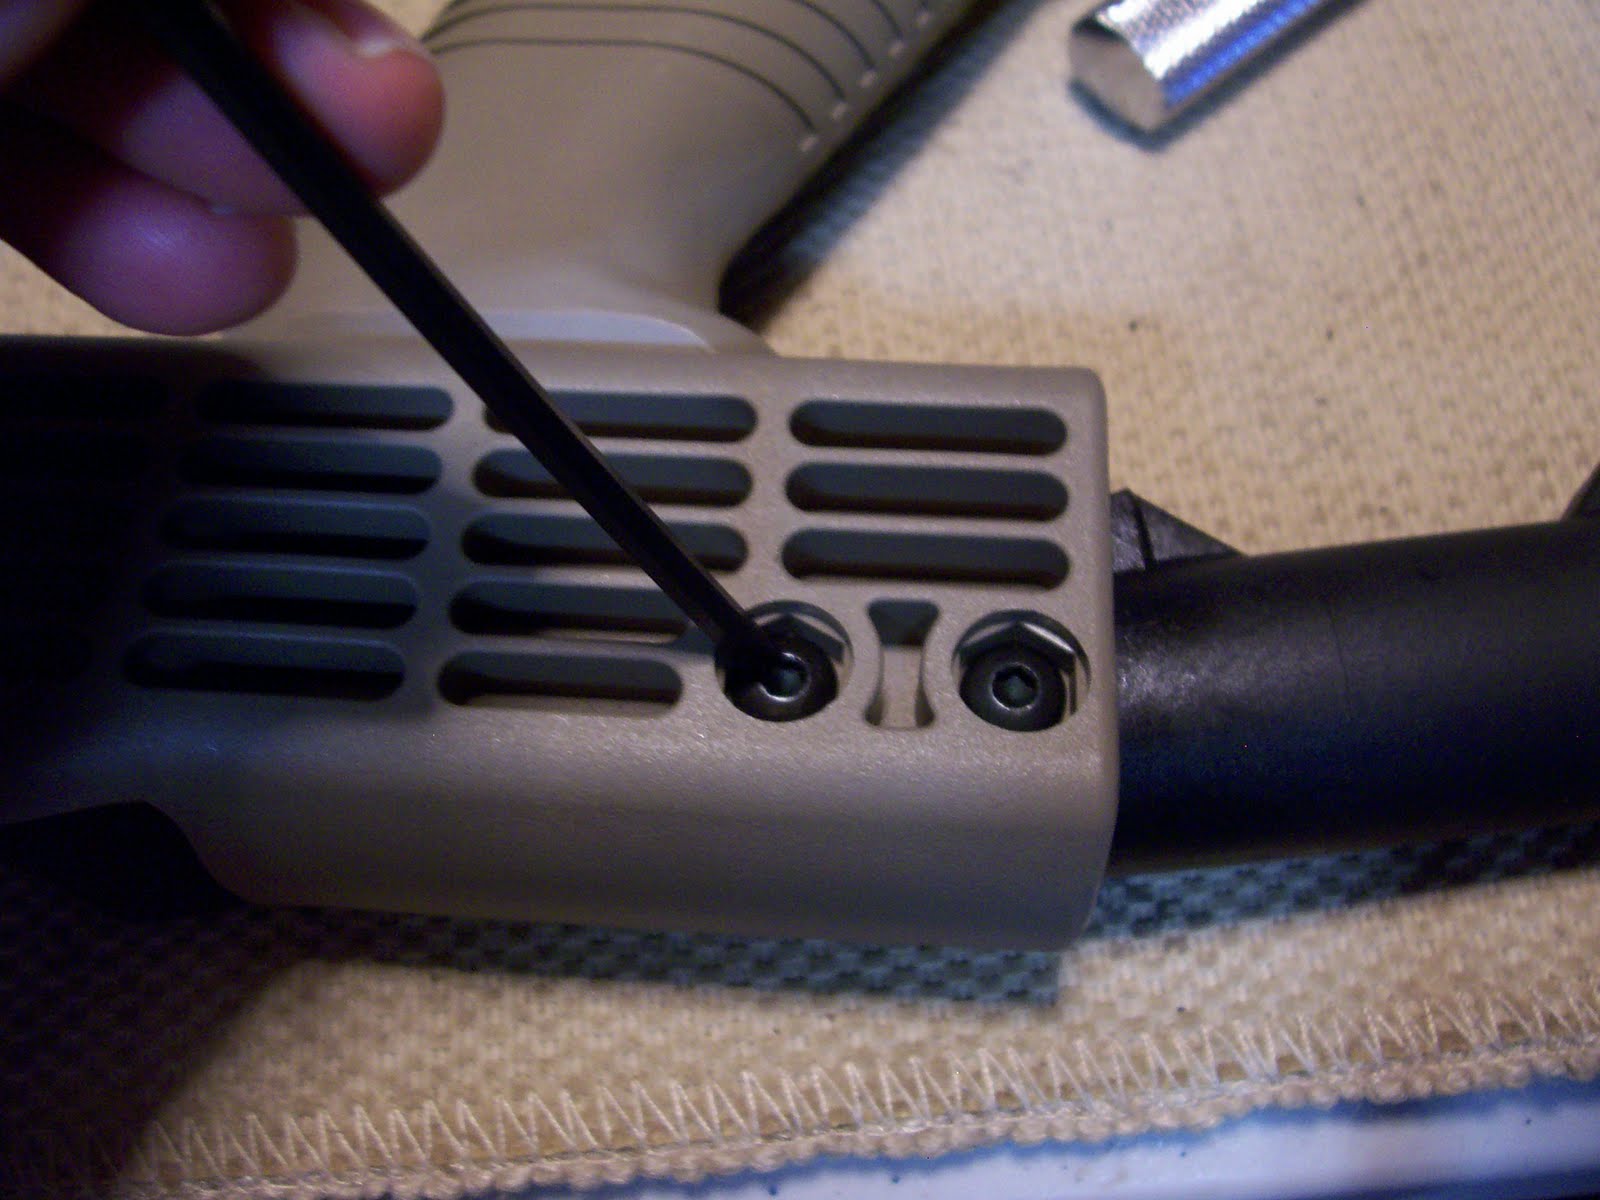
The Tapco stock takes a little assembly. The pistol grip is bolted on, and the stock is installed using two screws and bolts. Tapco includes two stock tubes, one slanted if your’re planning to use iron sights, and one straight if you’re going to use optics. I used the straight one.

Finally the barrel and receiver are installed using the take down screw from the original stock.
A hand guard is installed over the barrel, too.
It’s important to know that the barrel for a Ruger 10/22 should not be free floated, but should be supported on the stock per the manufacturer’s instructions. This has to do with barrel harmonics of the .22LR, and a free floated barrel will not be as accurate on a 10/22 as it would on a larger caliber rifle.
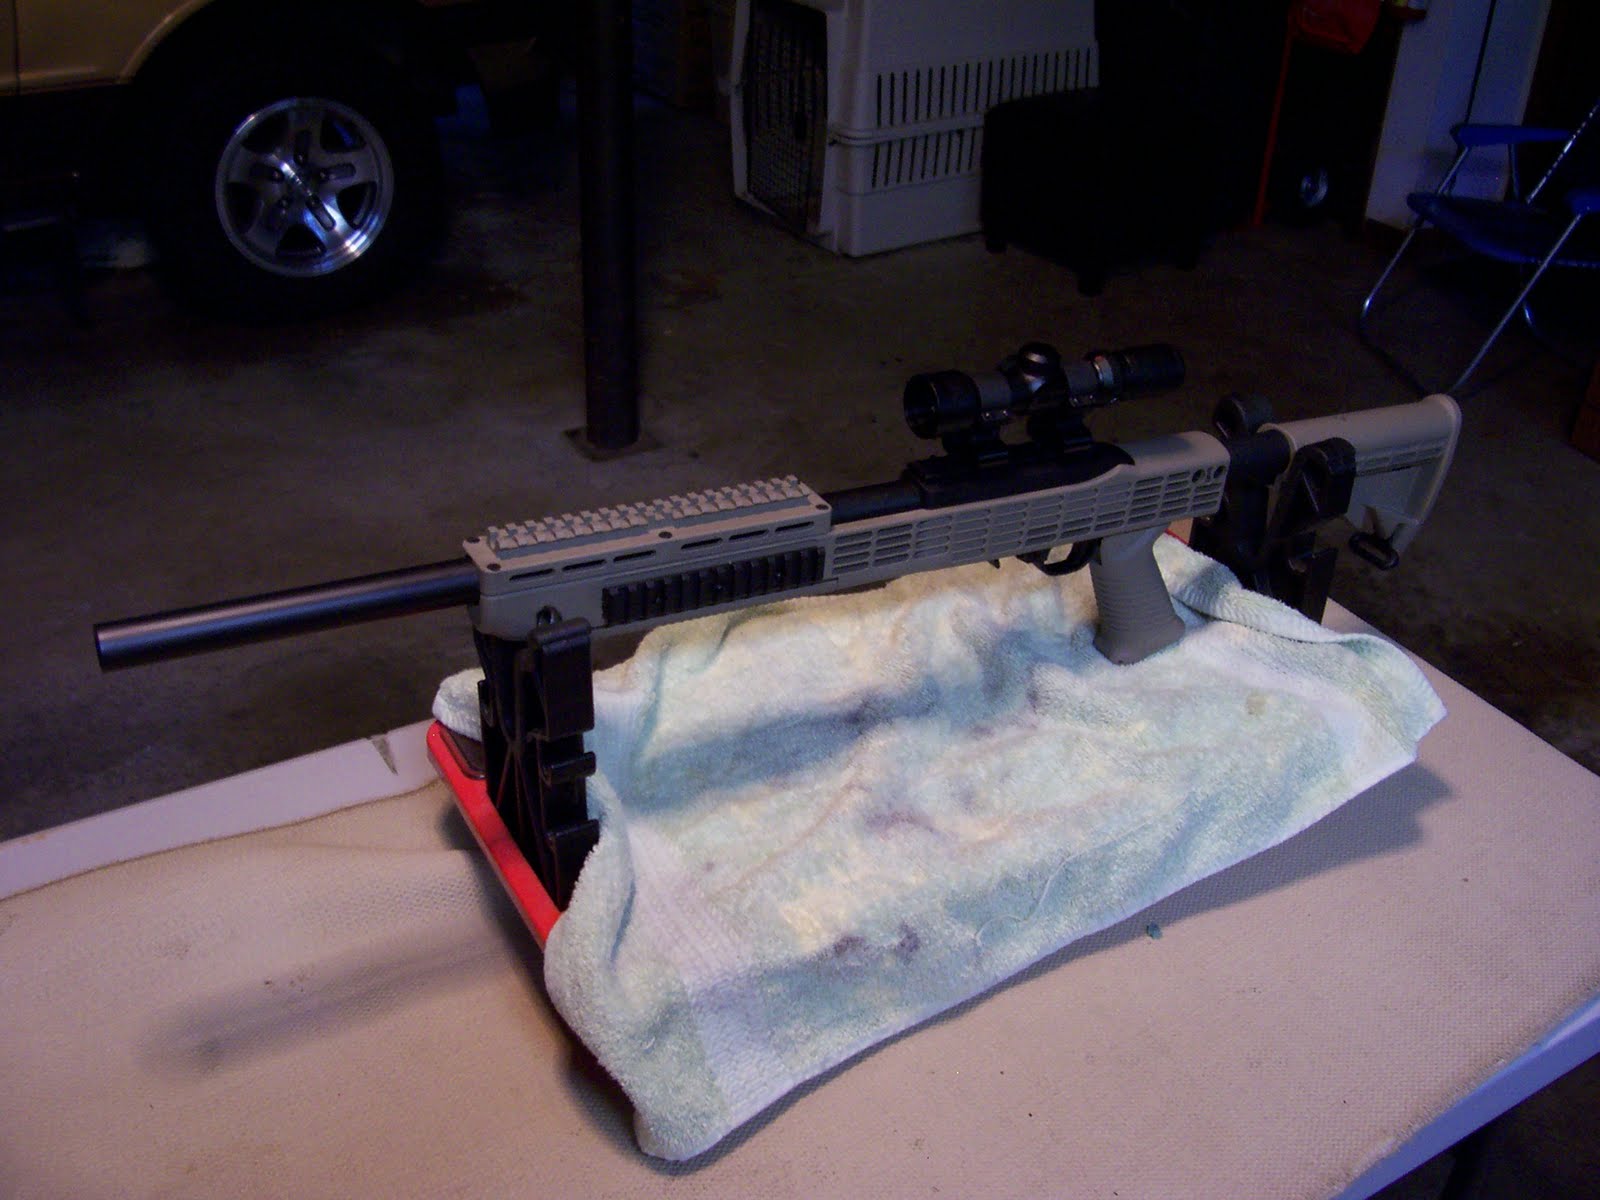
Finally, I installed a 2-6 x 28mm scope I had from a previous project, using some Weaver rings I had.
The final rifle is considerably heavier than the original, but is well balanced. The stock angle makes for an easy pointing gun, and set at 2x, the scope should do well even for close-in work.
Having said that, I am contemplating installing a 45 degree offset Weaver rail on the front rails, and installing a reflex or red dot sight for close-in shooting.
But, even without the red dot, at last, Captain America is ready to go fight the Nazis, or zombies, or whatever comes our way.
+++++
The key to any good paint job, as Bob Vila or Chip Foose will tell you, is preparation. One of the problems in the past has been to get paint to adhere well to plastics. For guns, one choice is to used Duracoat, similar to what I did on Lee, my Mossberg 500. However, Krylon makes a paint called Fusion that is designed to apply to plastic, and at about one fourth to cost.
To prepare it for paint, I read the back of the paint can and followed the instructions. First I removed the stock, and washed it with detergent and rinsed it well with water. I then wiped down all the parts to be painted with paint thinner, I stuffed the inside, where the gun action goes, with newspaper, to prevent over spray. I also inserted a foam ear plug into the main screw hole that connects the gun receiver to the stock, since the threads needed to stay clean.
I hung the stock up by a piece of wire and painted the base coat, blue, using long flowing strokes, and light coats. The key is to not add enough paint that there’s enough to run. I let it dry 10 minutes between coats, and put on 4 coats of blue.

I then taped off everything except the area I wanted the red strip to be, and did three passes in red.
I admit I wasn’t sure if I wanted the white stripe, so at this point I stopped. But I did decide on the white, so I had to wait 24 hours before taping it again and adding three coats of white.
Finally, it was done, and after an hour I pulled the tape. I let the paint cure for several days, then installed the gun action.
I didn’t try to install the optics until a full week had passed, because by then the paint has set up to a very hard finish.
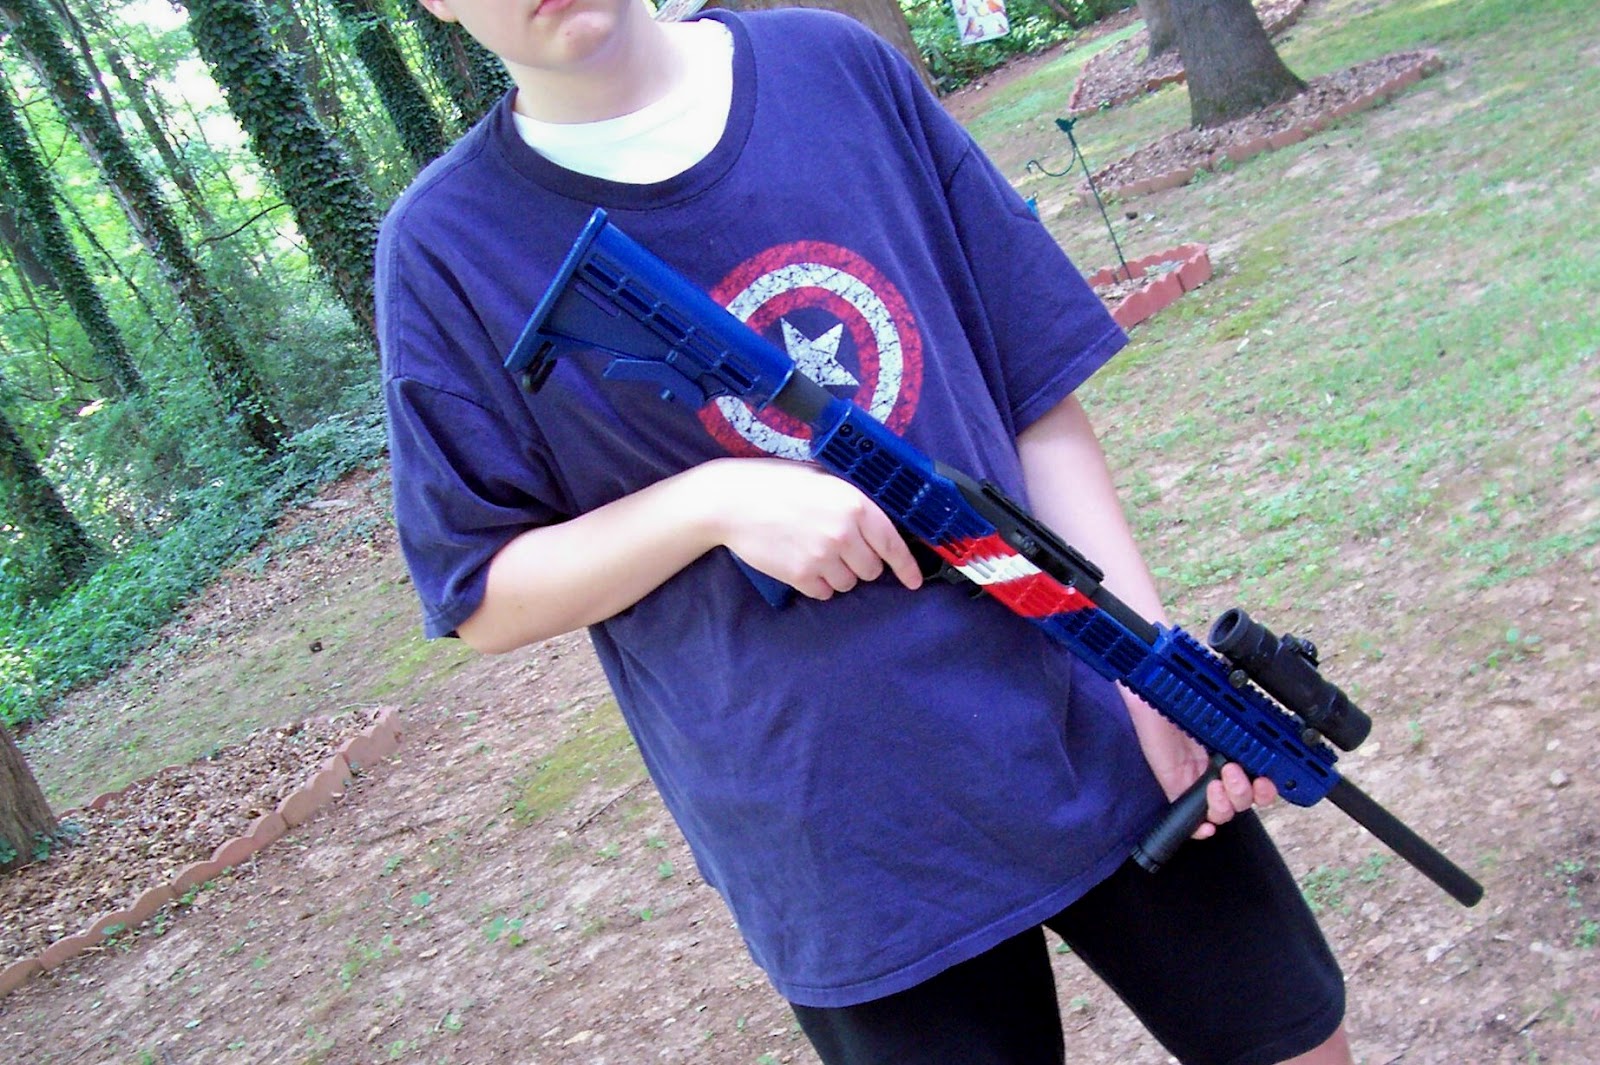
I re-installed the front grip and the red dot sight, and now I’m looking forward to a range trip with the finished gun. Stay tuned.
