2019 has started out well as the year of my return to competitive shooting, and I am working to keep it going.
It started with USPSA at Cherokee Gun Club, and River Bend Gun Club. As I reported before, I decided to switch from Production to Limited Minor, and, while I can’t say I’ve seen a big difference, not having to plan my stage based on 10 rounds is rather nice. I now pack 18 rounds, plus one in the chamber if I need it, and this usually means only one mag change.
The result of this is I am shooting the Classifiers well enough that I think I can start out as a C class Limited shooter, once I get 6 scores. Seeing that I spent 7 years as a D class Production shooter, I feel good about it.
The next news came from the GSSF match in Dawsonville on March 16, where I shot 94.16, beating my best match ever by over 8 points. I did this y have zero Mikes, and by shooting my fastest times ever on 5 to Glock and Glock M.
Of course, being a perfectionist, I look at Glock the Plates and ask why I didn’t do my best ever, there? But it was easy to see – my stages went 10.47 >> 9.21 >> 6.12 >> 6.21. Since this was my first stage, the answer, to me, is warm up. I could have shot it 7 seconds or so faster. But I’ll take it.
So where is this coming from? Dry fire. I’m spending at least 15 minutes a day in my office dry firing, smoothing up my trigger pull. about a third of that is draw and fire, to speed up my first shot and make it accurate.
And, I have to admit, watching myself on YouTube, my next area to work on needs to be to lose weight and speed up. Given I have always had catcher speed, I don’t know if losing the weight will really work, but it can’t hurt.
Like a lot of people, I became acquainted with Wyatt Earp through the movie Tombstone. Now, I know it’s not the most accurate, historically, but I will say that Kurt Russell’s portrayal captivated me. Anyone who follows me on Twitter knows that.
Since watching the movie I have learned a lot more about Earp. One of the things that I noted was that he survived quite a few gun fights, and survived to quite an old age. My take is that this was due in no small part to his shooting style, which was not the norm of the day, from what I gather. The impression I get is that the average shooter was more “spray and pray,” while Earp was in the Hickock mold of “slow and steady.”
This post is about how I moved from “spray and pray” to “slow and steady.” Thank you, Mr. Earp.
+++++
I have been competing in pistol matches for about 20 years now. When I first started competing, I admit, I got into some bad habits. I found that, because of the way scoring was done, and the people I was shooting against, that my shooting speed determined how well I did, more than accuracy. So, I shot fast, and didn’t worry so much about score.
I won some matches.
Don’t get me wrong, I was never fast. But I was faster than those I shot against, who had come up in the Bullseye school, so they pretty much stood in one place, shot targets, then moved to another place. I, on the other hand, learned to shoot on the move, which really improved my times, and thus not my final scores. And I learned to reload on the move.
Over the years, as I look back, I see that I adopted the “spray and pray” style. I went just about as fast as I could, and as long as I didn’t miss too many targets (and my standard for “too many” was very loose) I felt I was doing okay. Yes, I saw that my scores were getting worse, and my classifications were getting lower. But I was ingrained in my style.
Now, time and age have taken toll, and my lumbering has been reduced even more. At last, due in part to writing this blog, and having it in my face, I decided to try to improve. I had to find a way to shoot better.
I finally realized that I could not miss fast enough to win. I had to do something.
I decided to adopt Wyatt Earp’s style, and shoot for accuracy, and not for speed. And the journey began.
+++++
So, how do I improve my score? After all, scores in just about all the shooting sports are measured in time units. Meaning, in the end, my score is a time. So, telling myself that I was going to improve my scores, no matter the time, was somewhat confusing on a lot of levels.
But, how are the targets themselves scored? Let’s look.
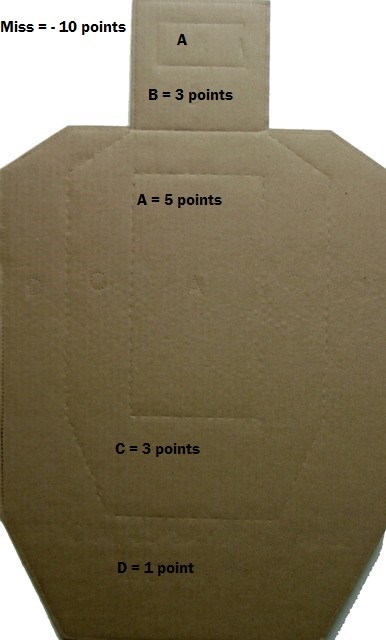
Here is the GSSF target, the standard NRA D-1. Note that if you shoot outside the A or B ring, you have penalty time added to your score. Shooting C’s is no big deal, but a miss can ruin your day.
The same thing applies to USPSA
On USPSA you get points for hits in A, B, C, and D areas, and that is divided by your time. Note that the penalty for a miss is twice the maximum points on the target, or minus 10 points.
So, what I found is that poor shooting – D ring or worse, misses – killed my scores, no matter how well I shot.
I could therefore improve my score – my shooting time – by hitting the center of the target.
Duh.
+++++
So, I changed my style. It took practice, and it wasn’t over night. I had to get used to aiming and getting a good sight picture before releasing the shot. For a lot of people this is no issue, but for me, it took some learning.
You see, part of what happened as I grew older, shooting for speed without much care for accuracy, was that my eyes were getting older, to the point where I could not focus on the front sight. Now, to a “spray and pray” shooter that didn’t matter much, as I was shooting as soon as I had any sight picture at all. This led to a lot of misses.
But a couple of years ago I decided to change that, by getting some contact lenses that let me see the front sight. Now, I had to learn how to shoot again, the right way, and it has taken me a little while to learn how to get a good sight picture before releasing the shot.
It has taken a lot of dry firing to teach myself to do that. A lot. And a lot of slow fire practice. And a lot of slow transitions.
The results have been impressive, to me any way. The first milestone came this spring when I shot my first clean match – one with no misses at all. Then came a match this summer where I actually shot a perfect stage – I knocked down four steel targets with one shot each, and shot all the paper targets in the Alpha zone. I was almost giddy.
Yes, there are those who will point to all Alphas and say that I am not shooting fast enough. Right now, that’s okay. I will learn to speed up, but not right away.
I still shoot on the move, and my scores are showing the improvement. I suspect that my Classifier scores will help me move up to C class in the next revision.
Since then, I have repeated the No Mikes performance in each match, most recently in the GSSF Glock Annual Shoot at Conyers, GA, last month. This GSSF match turned out to be the best GSSF performance of my life. I’ve been shooting GSSF for 18 years, and this was the best.
So now, I think of Wyatt, and I “take my time” and shoot for score.
+++++
Now, to lose weight, and get faster. Who knows where I can head next.
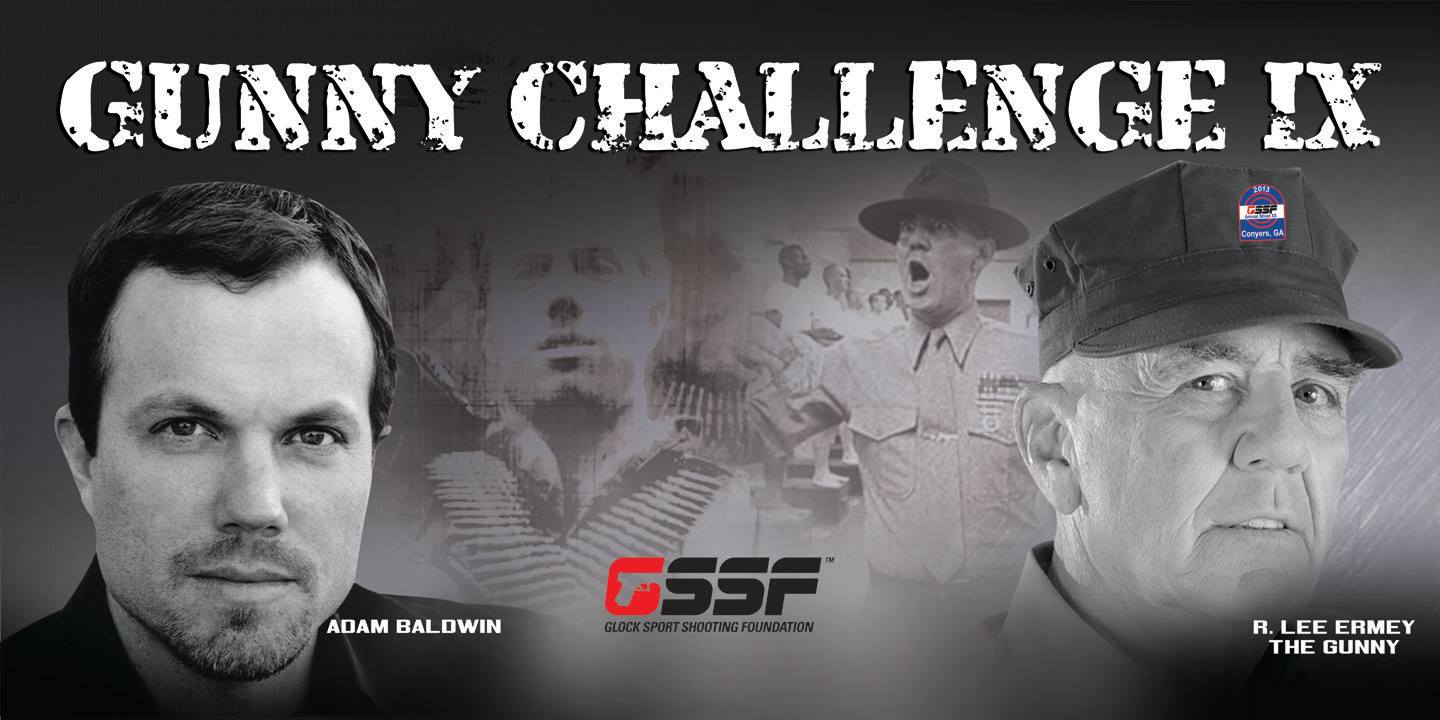
The Glock Sport Shooting Foundation holds a number of matches throughout the US – by my count, 47 in 2013. If you won your category in any of those matches, you get invited to a special match, held at the Glock Annual Shoot at the South River Gun Club in Conyers, Georgia, called the Gunny Challenge. This event is hosted by Glock spokesmarine R. Lee Ermey, and is a shoot-off for the coveted Gunny Challenge Cup.
This year, the Gunny Challenge will be co-hosted by actor Adam Baldwin, who appeared in Full Metal Jacket, Independence Day, and several other movies and television shows. He may be best known as Jayne Cobb from Firefly.
Here is Glock’s official promotional banner. Personally I like mine better.
I have reported on the GSSF and Gunny Challenge before, and I will be there Saturday. If you plan to be there, please drop me a note,send me an email,Twitter, or Facebook. We’ll meet up.
Here is a chart from Ron, showing the five year cost of competing in IDPA, 6 matches a year.
Courtesy of When The Balloon Goes Up
To me, this chart bursts a few bubbles. The average shooter (that is, me) frets and worries about choosing the right gun, basing a lot of the decision on the cost of the gun, especially as a newcomer. Yet, as one can obviously see, the relative cost of the gun versus all the other costs – ammo, accessories, entry fees, practice sessions – argues that we should pick our guns based on the best gun for us as shooters, regardless of the price.
That is, of course, a very difficult thing to do. After all, we lay out the money for the gun in one lump, and most of the other money gets spent on an ongoing basis, certainly in sums less than what we laid out for the gun. For me, buying ammo a case of 1000 at a time, I spend $250 or so at a time, and it feels like a lot, even though it’s about half of what I spent on the gun.
++++
Having read this from Ron, I decided to calculate what I spend on my competition over 5 years.
Here it is, for the hardware.
Glock 17
$400
Parts
150
Magazines
60
Belt
50
Holster
60
Mag pouches
40
Hearing pro
30
Eye pro
0
Knee pads
10
Range bag
0
Total hardware
$800.00
Some explanation – I bought my Gen2 G17 in 1992. For competition I added a set of Warren/Sevigny sights, a (-) connector, and an extended magazine release. My eye protection was given to me, and I made my range bag out of a bag I got at a trade show.
As for the cost of competing, let’s look at a 5 year cost of shooting GSSF:
GSSF
$125
GSSF Match Fees
375
GSSF Ammo
540
Total GSSF
$1,040
For 5 years of USPSA:I join on an annual basis, but you could get a 5 year membership for $95. The match fees assume I shoot 3 matches a year. I also assume to shoot 3 boxes of ammo at a match.
USPSA
$200
USPSA Match fees
1,200
USPSA Ammo
2,880
Total USPSA
$4,280
Again it would be cheaper to join as a five-year member. I assumed an average of one club match a month, although I have access to 3 matches easily. This does not assume any major matches, or overnight travel. I also assumed 4 boxes of ammo per match.
Then, of course, is the cost of practice. Assuming I shoot 4 boxes of ammo per month in practice, at $12 per box, I would spend $2,880 over 5 years. Add to that the cost of range time. (For me, I shoot at a Georgia Wildlife Management Area range, which costs me $20 per year.)
So, in total, over 5 years, I would spend:
Hardware
$800
GSSF
1,040
USPSA
4,280
Practice
2,980
Total
$9,100.00
That is a chunk of change, no matter how you do look at it, an average of $1820 per year, or about $150 per month.
++++
But another way to look at it is fixed cost and variable costs.
Fixed
$875
Variable
8,235
At the beginning, one would lay out $800 for hardware, plus $35 for GSSF and $40 for USPSA. Then, you could look at it as the balance of $8,235, spread out monthly over 5 years, or $137 per month, or $32 per week.
Now, it doesn’t seem like so much, which is why I suppose I still do it.