Teaching the Next Generation

The Dauphin, ca. 2010

The other night at dinner, my son, the Dauphin, told me that, after giving the subject a lot of thought, he would like to take up competitive pistol shooting.

Needless to say, I am pleased, and excited. We talked about the different sports – GSSF, USPSA, IDPA, Steel Challenge – and which he would like to try first. Our conclusion was that GSSF would be a great start, given that it doesn’t require drawing, reloading, or moving.

However, there are only 3 GSSF matched in my area in any one year, and the next one won’t be until next February. It became clear that he really wanted to get into shooting quickly, and USPSA, with 3 matches per month in our area, gave the best opportunity for that.

So, we talked about what skills he would need to learn, and we came up with a training plan to get him competing the quickest. There are basically two phases – dry fire and live fire – and the two phases may naturally overlap depending on how fast he learns.

The skills he will need to learn include drawing from a holster, changing magazines, moving between shooting positions, and shooting on the move. Here’s how we saw him training and learning:

Dry fire Live fire
Drawing
Trigger control
Moving
Magazine changes

He can even do a lot of the moving-and-shooting training using his air-soft gun.

Next, I will post about the specific drills and skills he will be practicing.

++++

I will admit a certain caution in taking on this training program. Some time ago, my wife and I were learning to snow ski, and I tried to teach her what I knew. It was not pretty. Suffice it to say that, once I exhaust what I know about drills, I may skip the drama and go straight to paid instruction. Fortunately, in my area there are a lot of good teachers.

++++

Some day, soon, he will score better than I in a USPSA match. I’m not sure how I will feel when that happens.

Stay tuned.

From Steve Rogers to Captain America

A few years back, I won $200 in a sales contest right before Christmas, and I used it to buy a bare bones 10/22 on Christmas Eve. At the time, I named the gun Paul after my boss. Earlier this year, I bought a Browning Buck Mark .22LR pistol that I named Bucky, and it just made sense to start calling the 10/22 Captain America.

The problem was, Captain America wasn’t special. It was still bare bones. Yes, it was fun to shoot, and I had proved that about 2,000 times. But it wasn’t an Avenger by any stretch.

In fact, it was more like 90 pound Steve Rogers.

So, I decided to start my own Super Soldier program*.

I started by disassembling the 10/22. This can be done with a screwdriver and a punch. In fact, my Glock Armorer tool just worked just fine. For my modifications, I needed the receiver, the trigger group, the bolt assembly, and the bolt handle, guide rod, and recoil spring assembly.

Actually, this photo is a little deceiving, as it shows the parts after about 20 minutes of cleaning. I had shot about 2,300 rounds through the gun without cleaning the bolt or the receiver. The bolt assembly was completely black.

For my first modification I swapped out the factory extractor with a Power Custom Sharp Claw Titanium Extractor. The factory extractor is a stamped metal piece, and I could see the Power Custom replacement has a sharper profile and a cleaner face. This new piece should eliminate the periodic failures to extract that I have seen.

I also changed out the bolt release with a Volquartsen Automatic Bolt Release. One of the things found annoying about the 10/22 was that to release the bolt, you had to press up on the bottom of the bolt release, while pulling back on the bolt handle, and holding your mouth a certain way, and reciting a Druid chant. Okay, the last two weren’t really necessary, but they didn’t seem to hurt.

This Volquartsen piece is designed so that you just pull back on the bolt handle, let it go, and the bolt releases. Just like a regular rifle. Gee.

Next, I removed the factory barrel. The barrel is held in place by a barrel retainer and two hex head screws. Removing the screws, the barrel slides out. Actually, since my gun had 2,300 rounds through it, I had to put the barrel in a vise (protecting it with a rubber insert) and pound the receiver with a rubber mallet to get it to let go.

I then scrubber out the receiver and made sure it was ready for a new barrel.

Then, out came the new hardware.

The barrel I chose was a Shooter’s Ridge bull barrel, that I bought at the gun show last weekend, and a Tapco T-6 stock I bought off of Amazon.

The barrel is installed in the reverse of how the old one was removed, but without the pounding and cussing. Slide the barrel into the receiver and line up the ridge for retainer with the retainer lip. Much easier.

Install the retainer using the two hex head bolts.

Install the bolt, then the trigger group.

The Tapco stock takes a little assembly. The pistol grip is bolted on, and the stock is installed using two screws and bolts. Tapco includes two stock tubes, one slanted if your’re planning to use iron sights, and one straight if you’re going to use optics. I used the straight one.

Finally the barrel and receiver are installed using the take down screw from the original stock.

A hand guard is installed over the barrel, too.

It’s important to know that the barrel for a Ruger 10/22 should not be free floated, but should be supported on the stock per the manufacturer’s instructions. This has to do with barrel harmonics of the .22LR, and a free floated barrel will not be as accurate on a 10/22 as it would on a larger caliber rifle.

Finally, I installed a 2-6 x 28mm scope I had from a previous project, using some Weaver rings I had.

The final rifle is considerably heavier than the original, but is well balanced. The stock angle makes for an easy pointing gun, and set at 2x, the scope should do well even for close-in work.

Having said that, I am contemplating installing a 45 degree offset Weaver rail on the front rails, and installing a reflex or red dot sight for close-in shooting.

But, even without the red dot, at last, Captain America is ready to go fight the Nazis, or zombies, or whatever comes our way.

Tomorrow, the range!

* I’m not going to explain the history of Captain America. If none of these things – Bucky, Steve Rogers, the Super Soldier program – make sense to you, do some research.

Project Update

A couple of months ago I talked about some upcoming projects that I wanted to do, and how I would decide the order to do them. The order turned out to be to refurbish my Mossberg 500, then build a new AR-15, then upgrade my Ruger 10/22.

Since then I have completed the Mossberg refurbish. I plan to go shoot it next week and report on the results.

However, a number of factors have led me to revise the order of the other 2. First is the fact that building the AR would have cost more money than I have available at this time, in essence stalling both remaining projects until I have saved up enough. Adding to this is the fact that the AR will add another caliber of ammunition to my inventory, relatively expensive ammunition.

So this led me to reconsider my rankings, and move the 10/22 rebuild up. In fact, all the parts are on order, and should be in hand by the weekend. This means that, barring a family emergency or zombie apocalypse, I should be able to complete the project, and take my 10/22 to the range next week.

So, given my earlier post about the rigorous method I used to rank my projects, how do I justify the change?

It turns out that the Utility factor has a lot more involved in it than just how much I would shoot the gun in a perfect world. I didn’t really consider the cost of ammo, which was a mistake.

And, it reminds me that rankings are fluid, and can change. And, it reminds me that, when it all comes down to it, as Captain Barbosa once pointed out, the rankings are really more like guidelines.

+++

Yes, I could reload my own .223, but that is, in essence, another project. It is on my list, but not very high, I admit.

+++

On a semi-related note, as I’ve related before, I name my guns, and my son and I almost always refer to them by name. The 10/22 was named originally Captain America, to complement Bucky, the Buck Mark. Since then, we’ve both taken to calling the 10/22 in its current configuration Steve Rogers. (If you are unaware of the correlation, Google it. Sorry, Carson’s Law.)

So now, here comes the Super Soldier project.

My Shotgun, Reborn

One spring day, not long after I had bought my first gun, I was at work, talking with a truck driver, while he was waiting for his trailer to be loaded. The conversation turned to guns. After all, it was spring, we were men, we were in Alabama, and I was a Gun Newbie. After a while, the truck driver mentioned that he happened to have a used shotgun for sale. Would I like to see it?

Sure.

It was a very nice pump shotgun, a 12 gauge. The wood was in good shape, and while some of the bluing on the barrel was worn, there was no corrosion. And the pump action was as smooth as glass. It had only one minor defect – a former owner had written his name on the barrel with a power inscribing tool.

I say it was a defect, but in fact, it was a blessing, because the person whose name was on the shotgun barrel happened to be the plant chief operator, and he was on shift that day. So I went and asked Lee about the shotgun. He told me of the large number of whitetail deer who were prancing in the fields of heaven because of that gun.

Was it worth $100?

Lee said he thought so, because that’s what he had sold it to the truck driver for, 3 years before.

So, at lunch, I went and cashed a check (these were the days before the ATM, friends) and the shotgun was mine. And I named it Lee.

Now, I had no idea what brand of shotgun it really was, and neither did Lee. The brand name on the gun is Revelation, sold by Western Auto. I tried taking it apart, but knowing nothing about shotguns, I didn’t get far.

The next day, my copy of American Rifleman arrived, and the monthly section on gun schematics and disassembly instructions featured the Mossberg 500 12 gauge shotgun. Everything looked the same as mine, and it came apart and went back together just like in the magazine. So, Lee was really a Mossberg 500. Thank you, Lord.

+++++++

A couple of years later, after I had moved away, I went back to my old plant for a visit, and Lee (the operator) asked about the shotgun. He then told me that he had been approached by the truck driver, to try to sell him the gun back, and he had steered him to me.

Again, thank you, Lord.

+++++++

Fast forward a number of years, and a lot of trap shooting, later. Now, the bluing on Lee had gotten a little more worn, so I decided I would like to re-blue it. I bought a re-bluing kit at the gun store, read the instructions, and completely de-blued the whole gun. I sanded all the pits and corrosion out, and – no offense – I used my Dremel to erase Lee’s name. Sorry, man.

Then I decided to search the Internet for info on how to re-blue guns, and I was confronted by tales of woe. It turns out that the Mossberg 500 has an aluminum receiver, which doesn’t take bluing well. So I decided I needed a little more experience in gun finishing before I gave it a try.

Fast forward a little more. Okay, probably 5 years more. The shotgun sat unfinished, all that time, while I periodically thought about refinishing, and stopped, because it made my head hurt. To assuage your fears, the barrel and steel parts were well oiled, and stored in a firearms sock in my safe. The small parts were stored in a plastic shoe box.

At last, thanks in part to the false sense of optimism this blog has given me, I decided to finally refinish Lee.

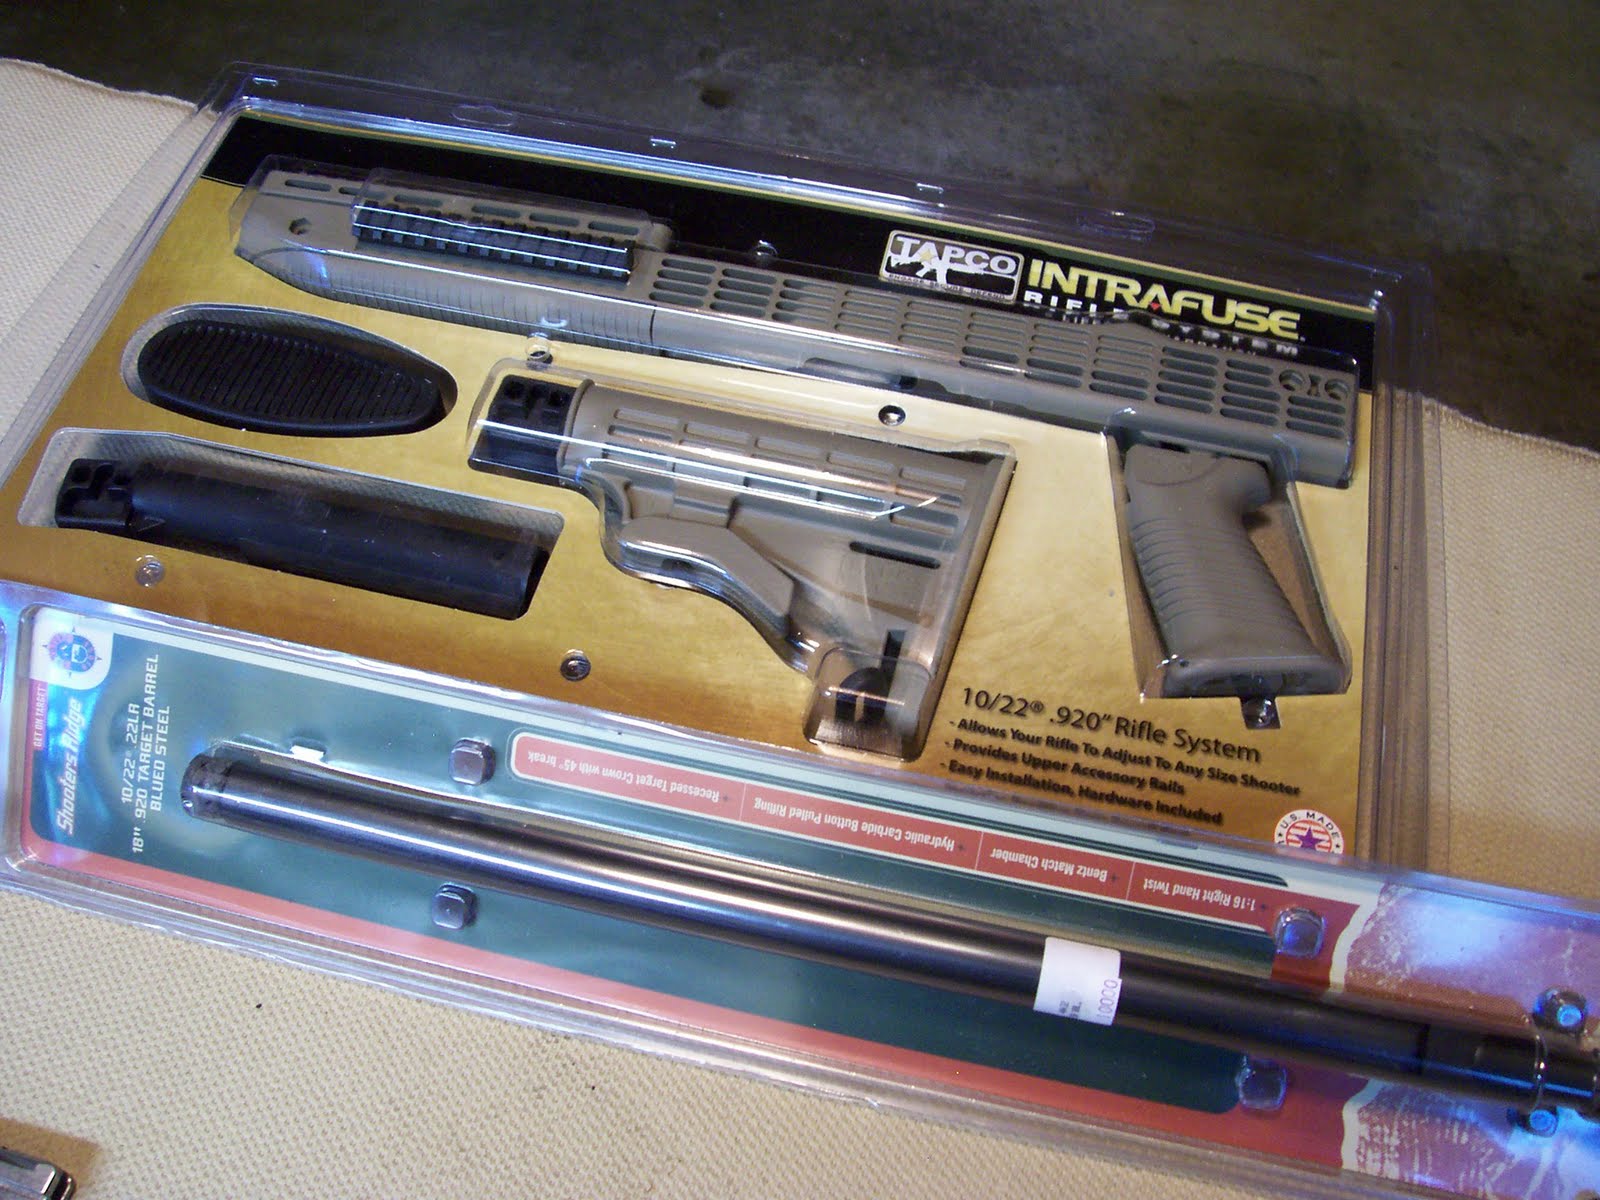
After a bunch of Internet research I decided to use Duracoat firearm finish, and a Hogue rubber overmolded polymer stock, to make Lee look like his Glock brethren.

++++++

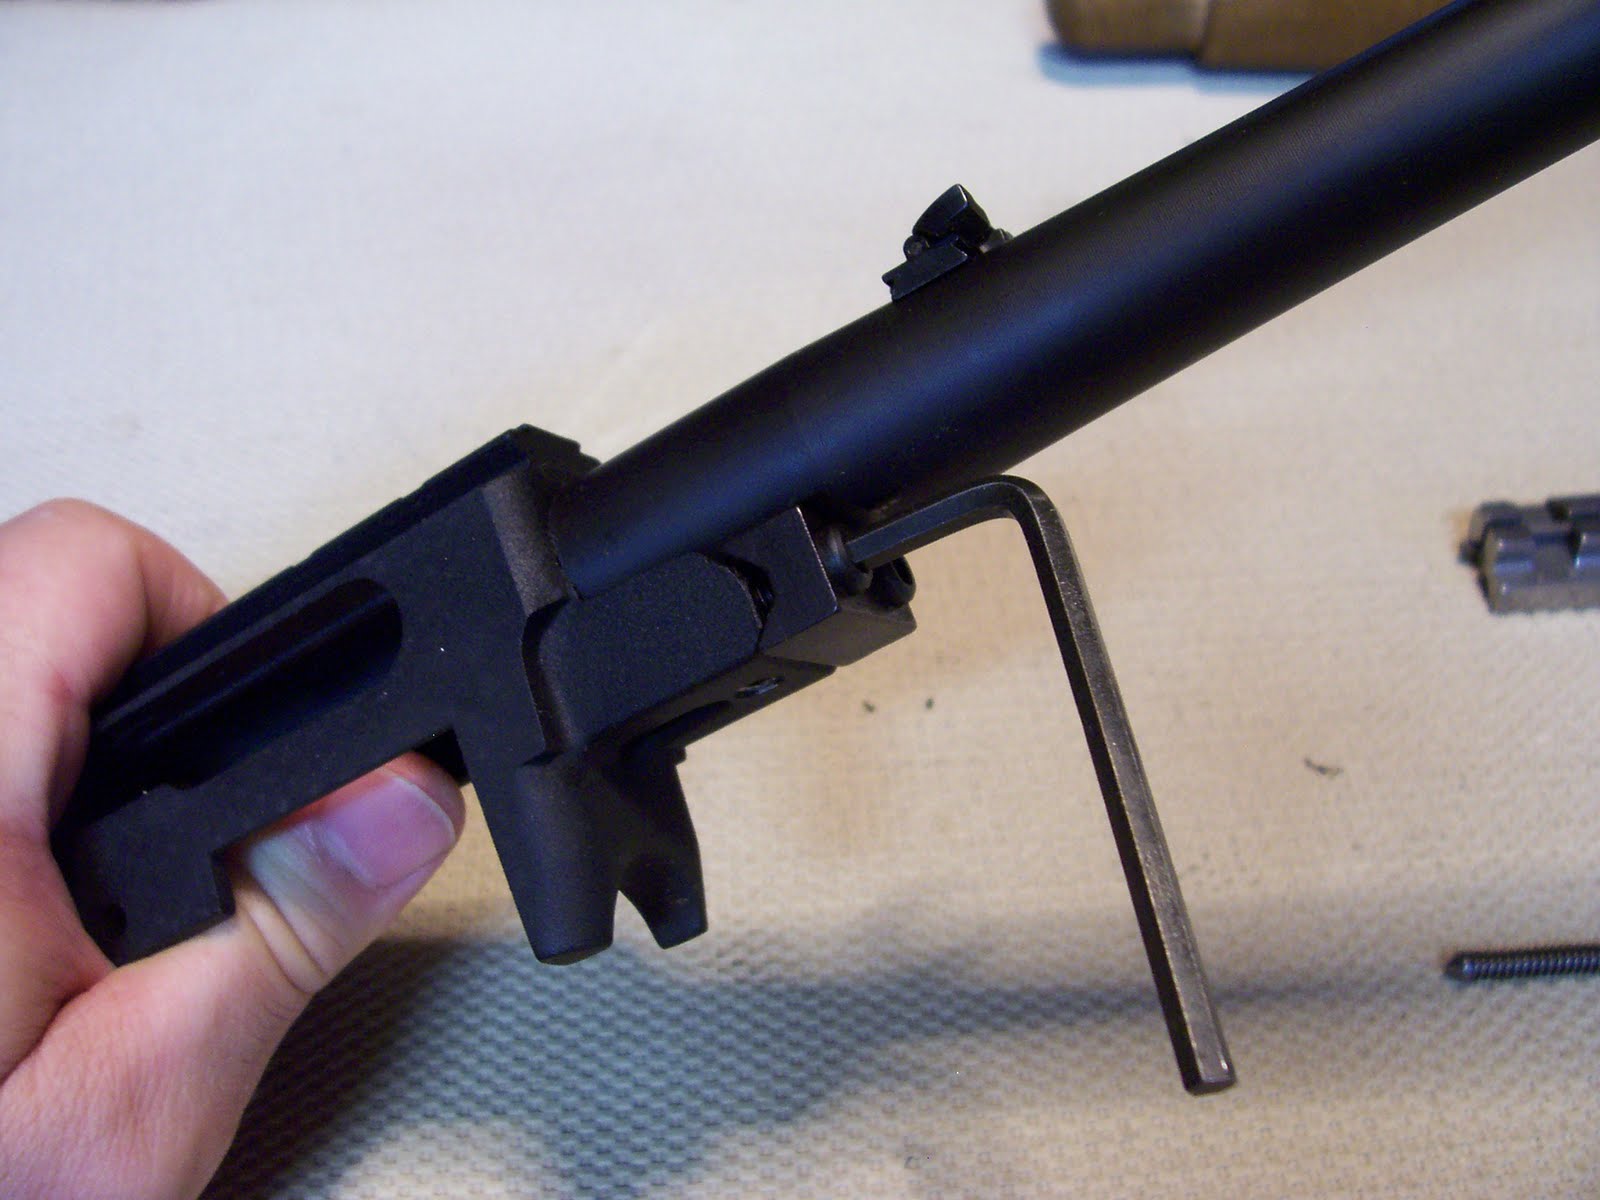
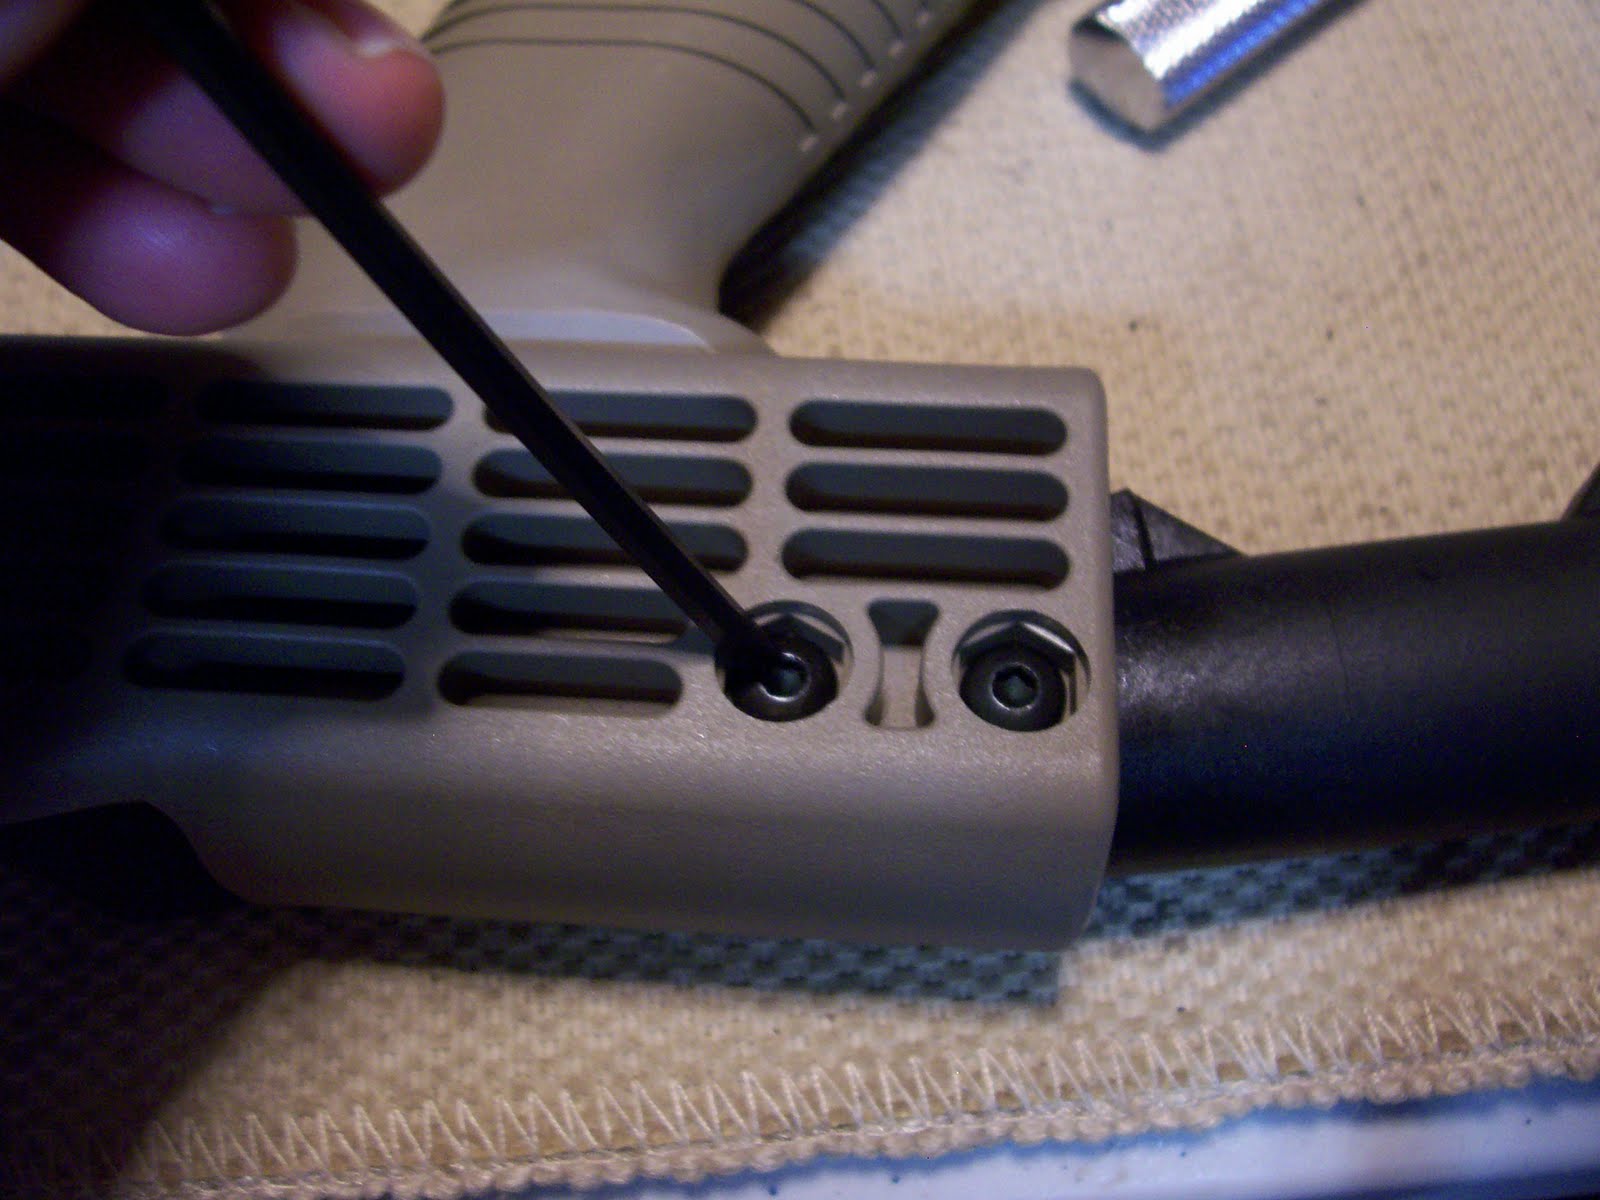
The refinishing process began with the fitting of all the parts onto the new polymer stock, to be sure I didn’t need to do any gunsmithing to make it fit.

Everything fit perfectly.

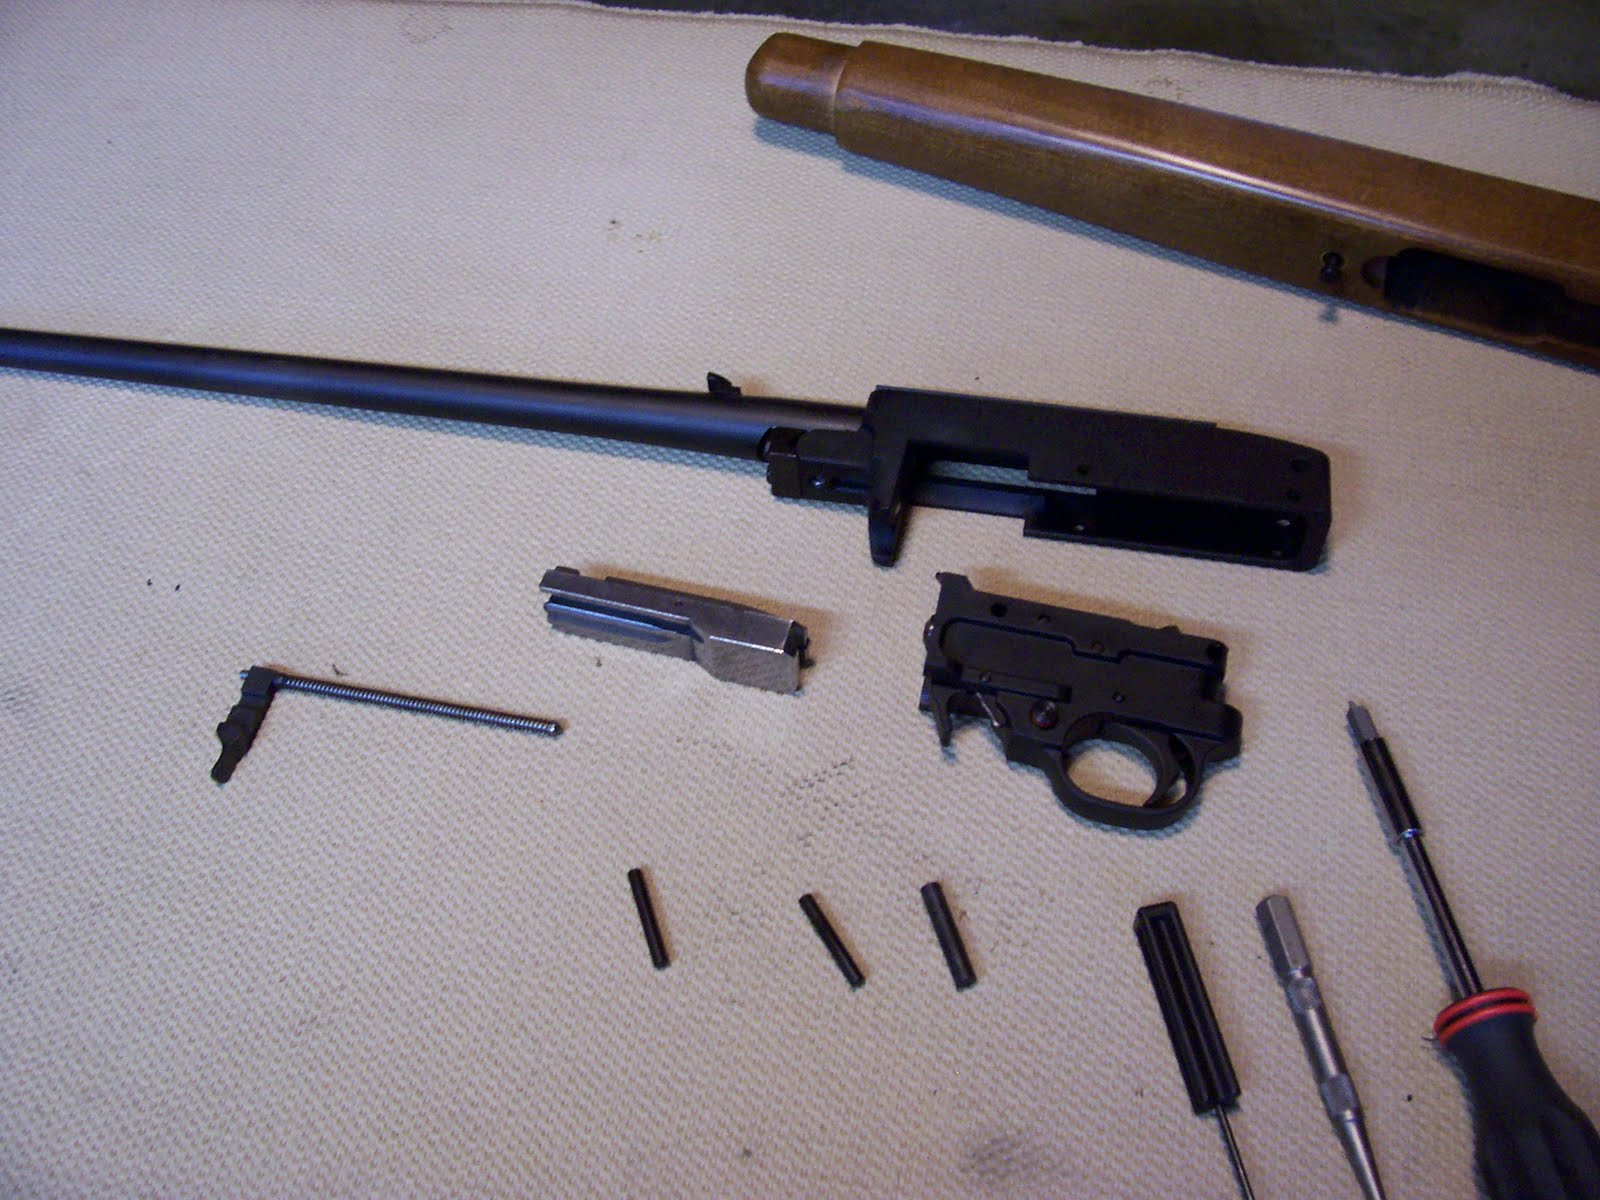
I then laid all the parts out to get ready. In addition to the Duracoat with sprayer that I bought, I also bought painters tape. I also remembered back when I was researching bluing, and they told me to fill in all the holes in the receiver with Silly Putty, so the finish wouldn’t get in the holes, and make them smaller.

I also got some 600 grit sandpaper for the final sanding, and some nitrile gloves to protect my hands.

I then went over all the metal parts with the 600 grit sandpaper, per the Duracoat instructions.

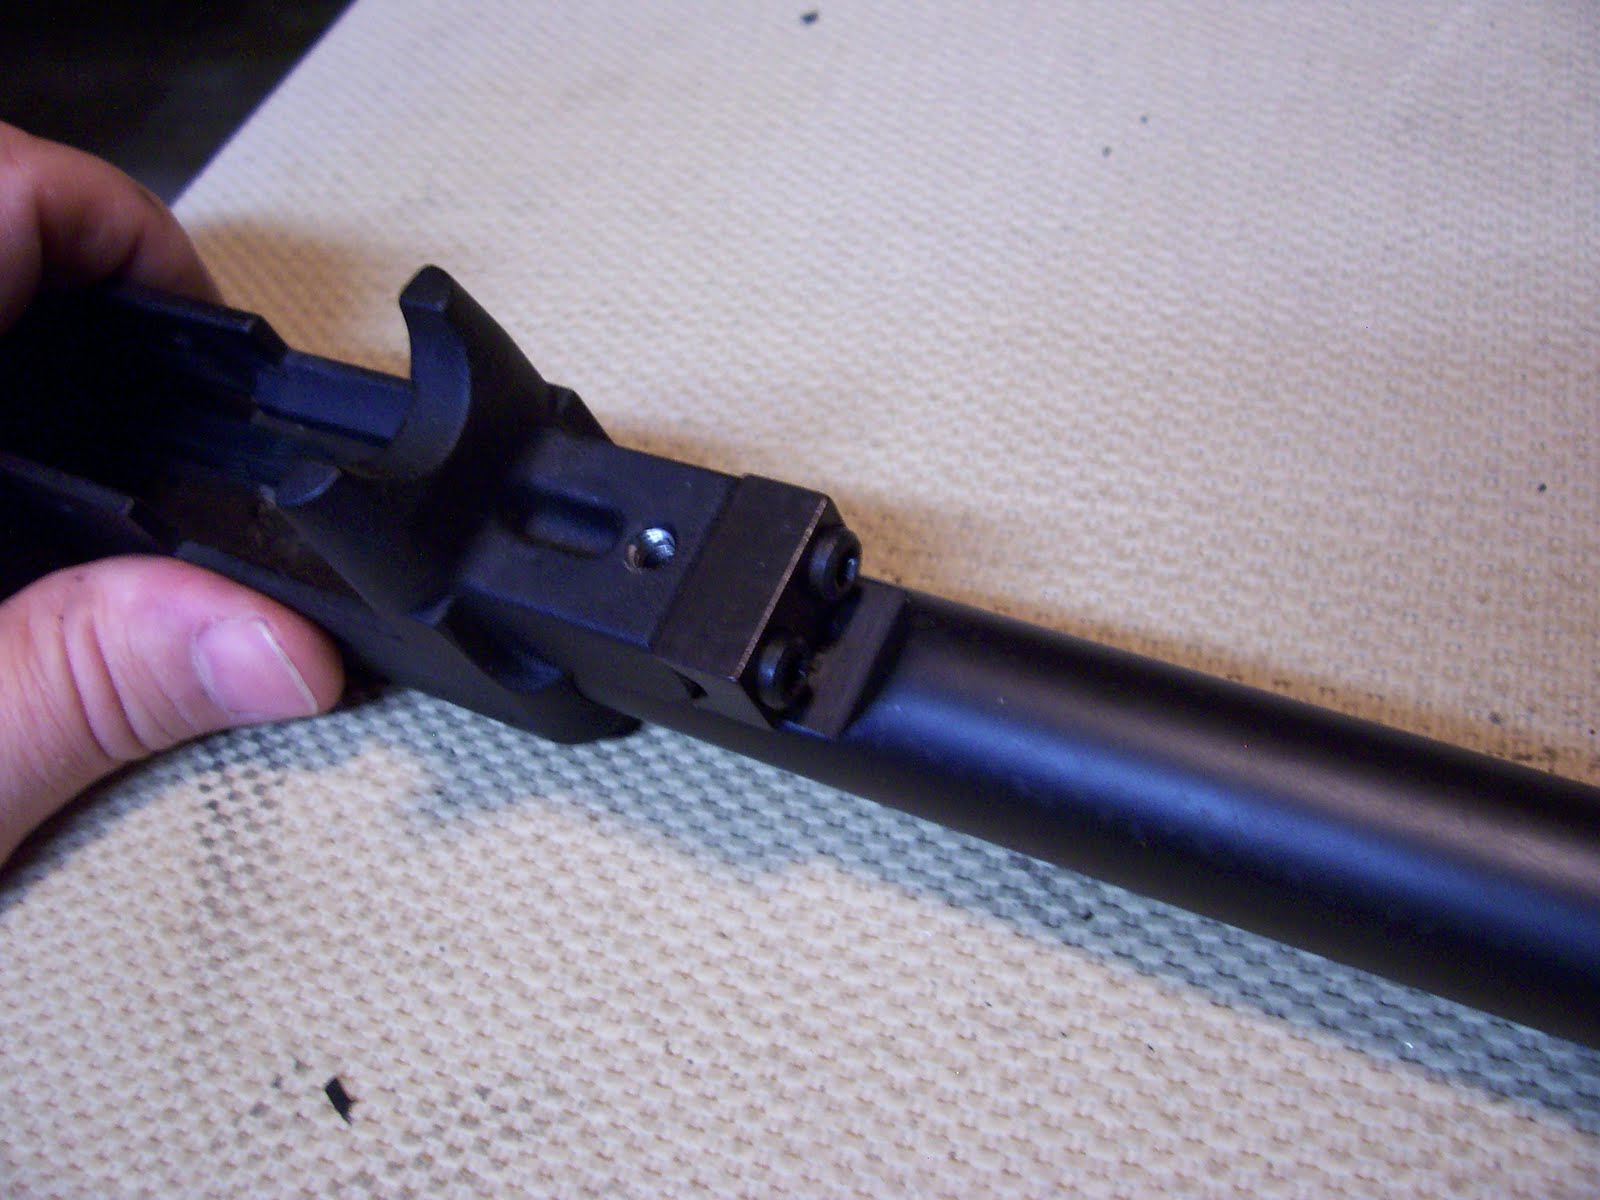
Here’s the trigger group taped off below the parts that will show in the final gun assembly:

I filled in all the holes with Silly Putty, and taped all the threads and other parts that I didn’t want to spray. I then sprayed the whole gun with the degreaser spray provided in the kit.

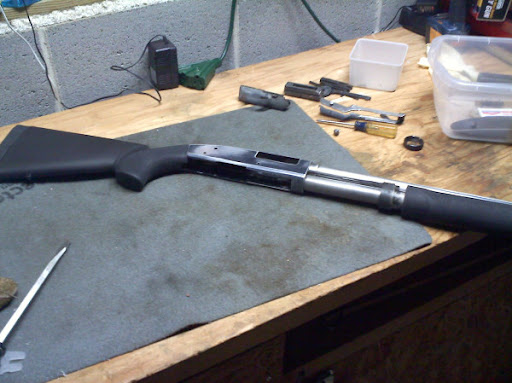
Here’s the receiver, hanging and ready to spray.

I then mixed the paint and the hardener in the glass sprayer bottle, and shook it all for the time they told me to. Spraying with a smooth even motion, I laid down the first coat:

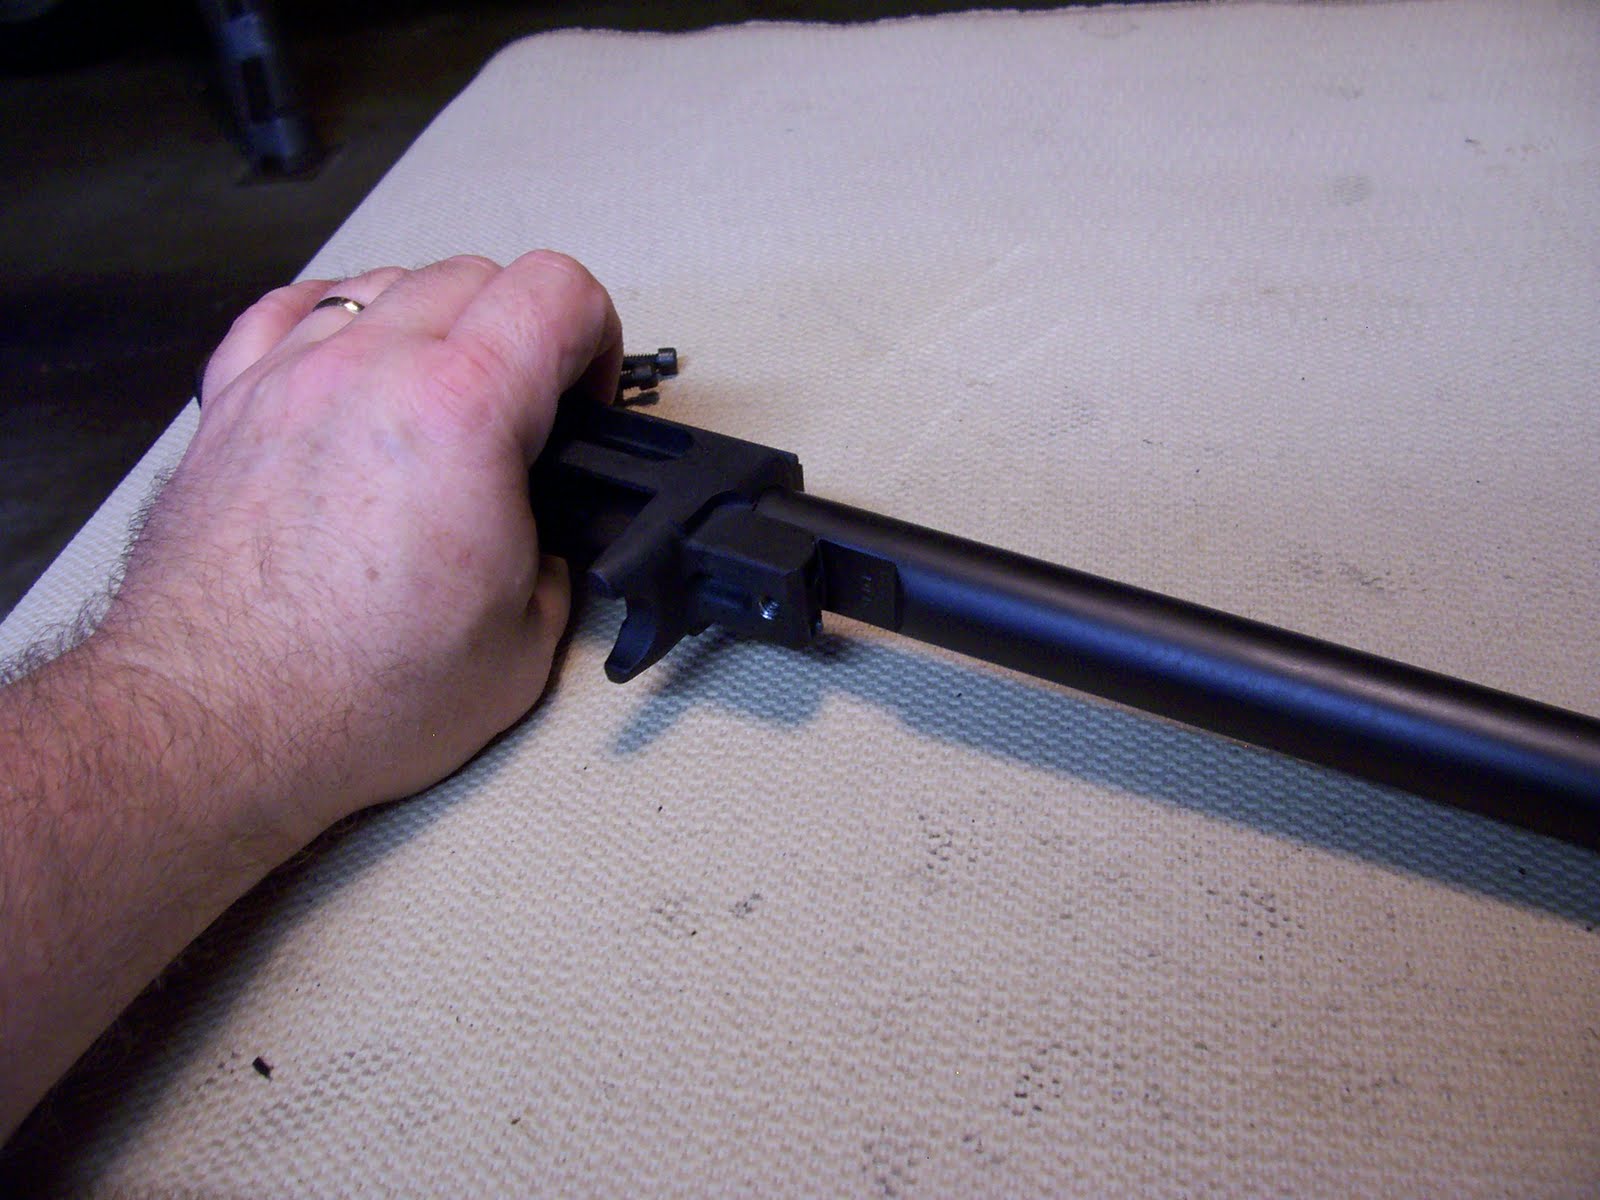
I also sprayed the barrel:

Three even coats, and all was done.

Sounds easy, right?

Ha!

First – the sprayer that Duracoat sold with the paint tended to sputter periodically. At random. Leaving some parts sprayed smoothly and evenly, and some running and dripping.

Actually, I’m surprised the paint stayed on, with the amount of cursing that I applied to the sprayer. I guess I’m glad the cliche isn’t really true.

So, instead of letting it dry five minutes between coats like the instructions said, I let it dry fifteen minutes, and tried to sand out all the drips.

Stupid idea. All I got was rolled up drips.

Eventually, my curse vocabulary exhausted, I managed to get it sanded well enough to get three coats on, and it not look like I had welded all the parts together.

Lessons learned:

First, I won’t use the sprayer that Duracoat sells again. Instead, I will invest a little more money in an airbrush sprayer and compressor.

Second – while it may work for bluing, I found that Silly Putty makes water bead up. This means it also repels paint, so that all the pin holes had halos around them, free of paint. I need to find something else to use, maybe just balled up paper.

So, while trying to sand out the drips, I also had to take out all the Silly Putty, and use the degreasing spray again. Then I could spray.

Third – in retrospect, I would not have Dremeled Lee’s name off the barrel. I now think it would have lent a sense of history, which I am trying, in a small way, to preserve here.

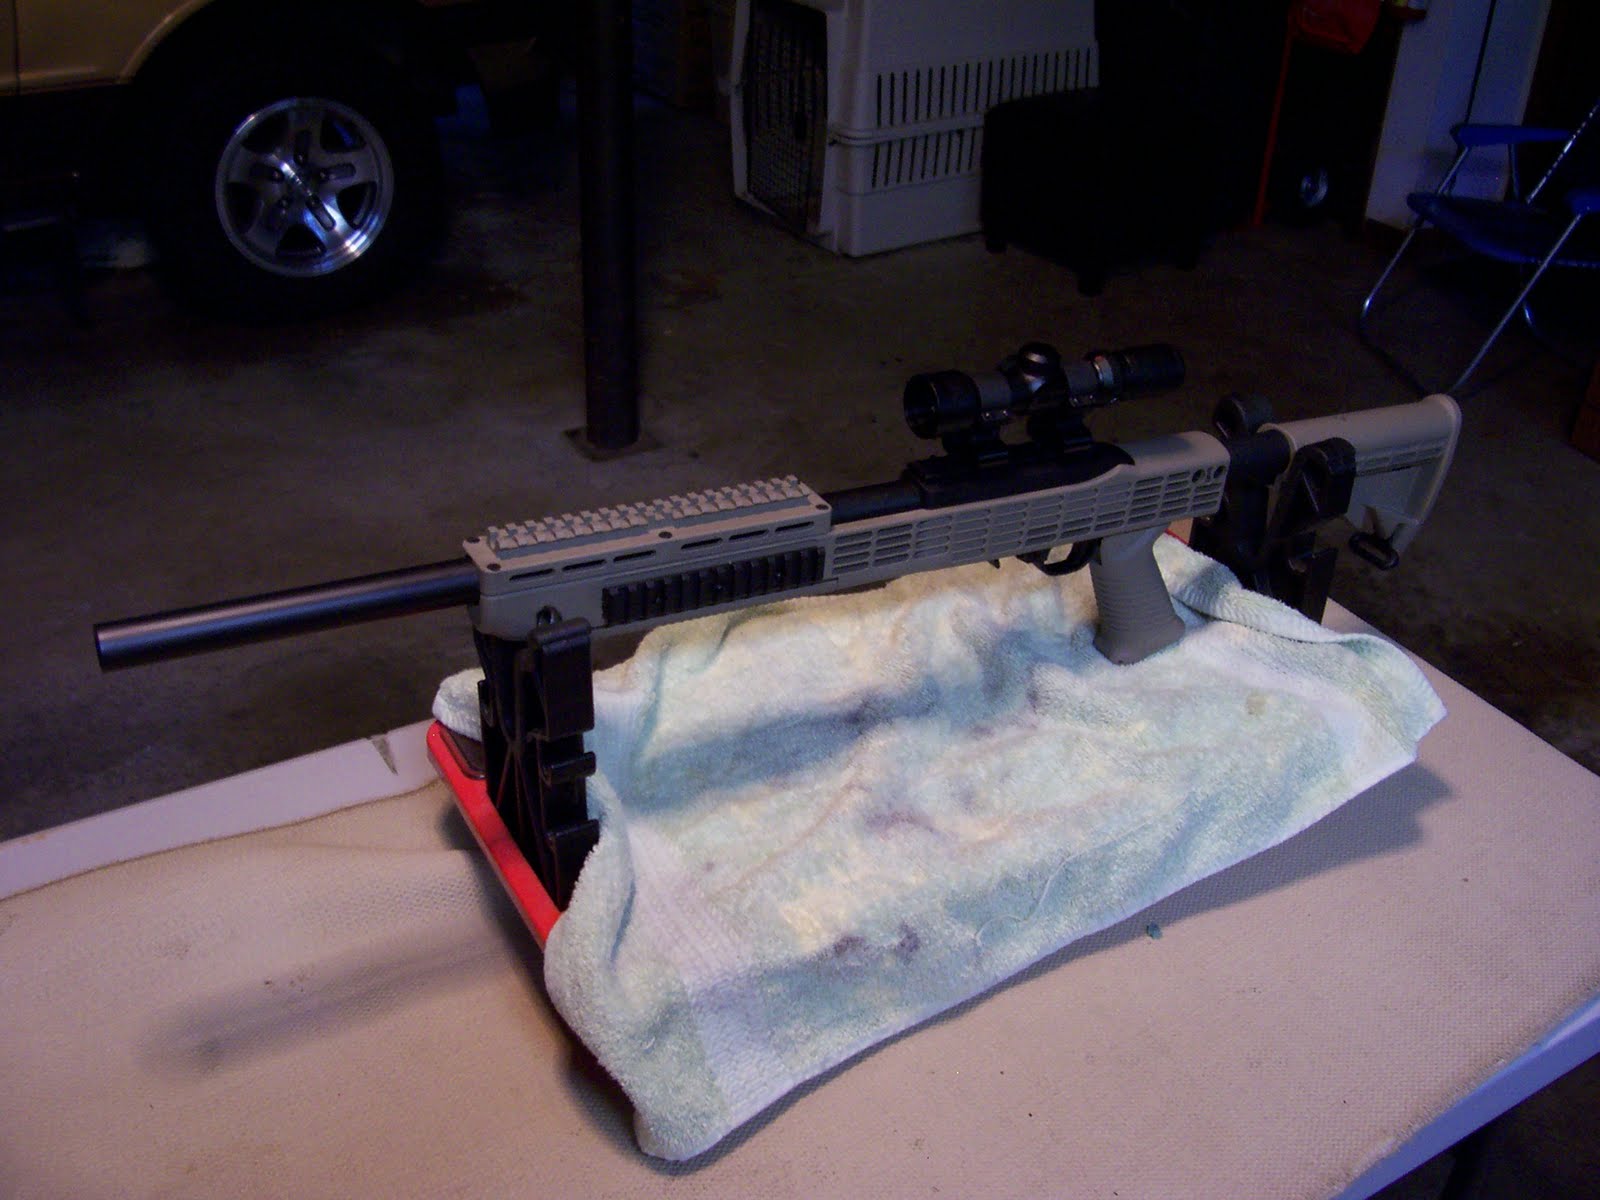
After drying overnight, I put the whole thing together. Of course, I had to watch a Youtube video, because I hadn’t done anything with this gun for 5 years. But the action is still smooth as glass, and it looks mean.

Behold, Lee, the Mossberg 500: